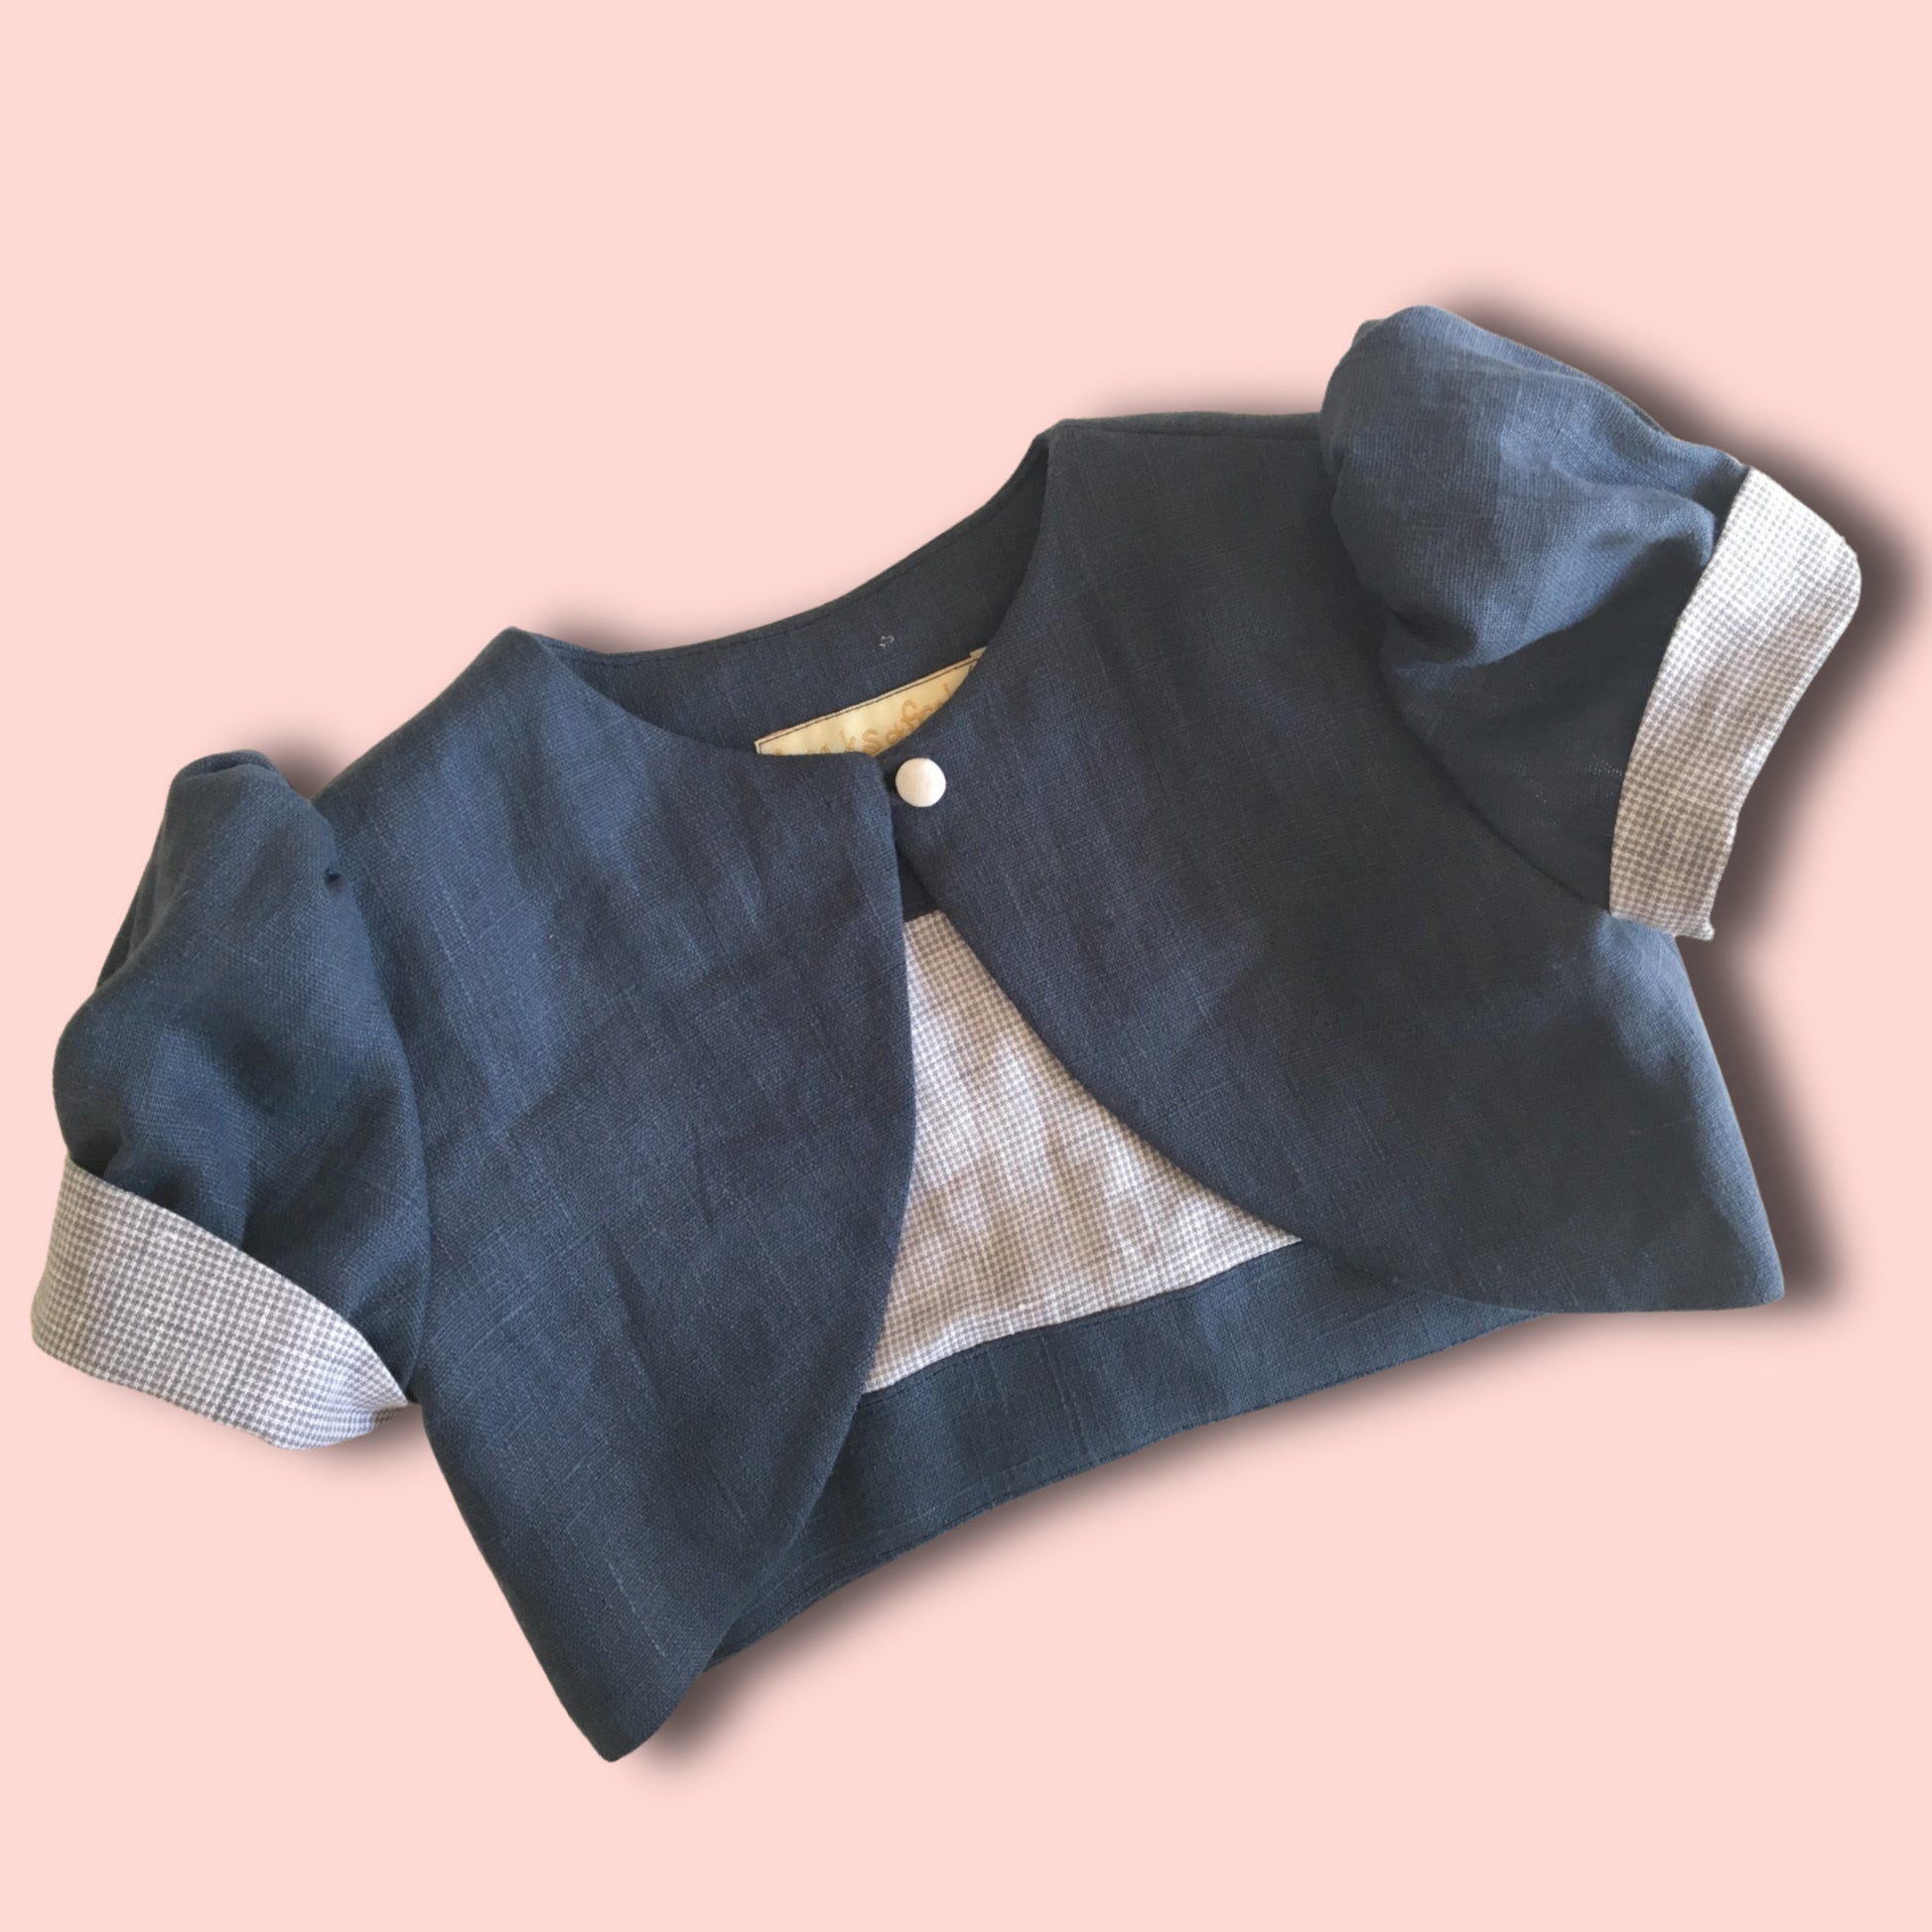
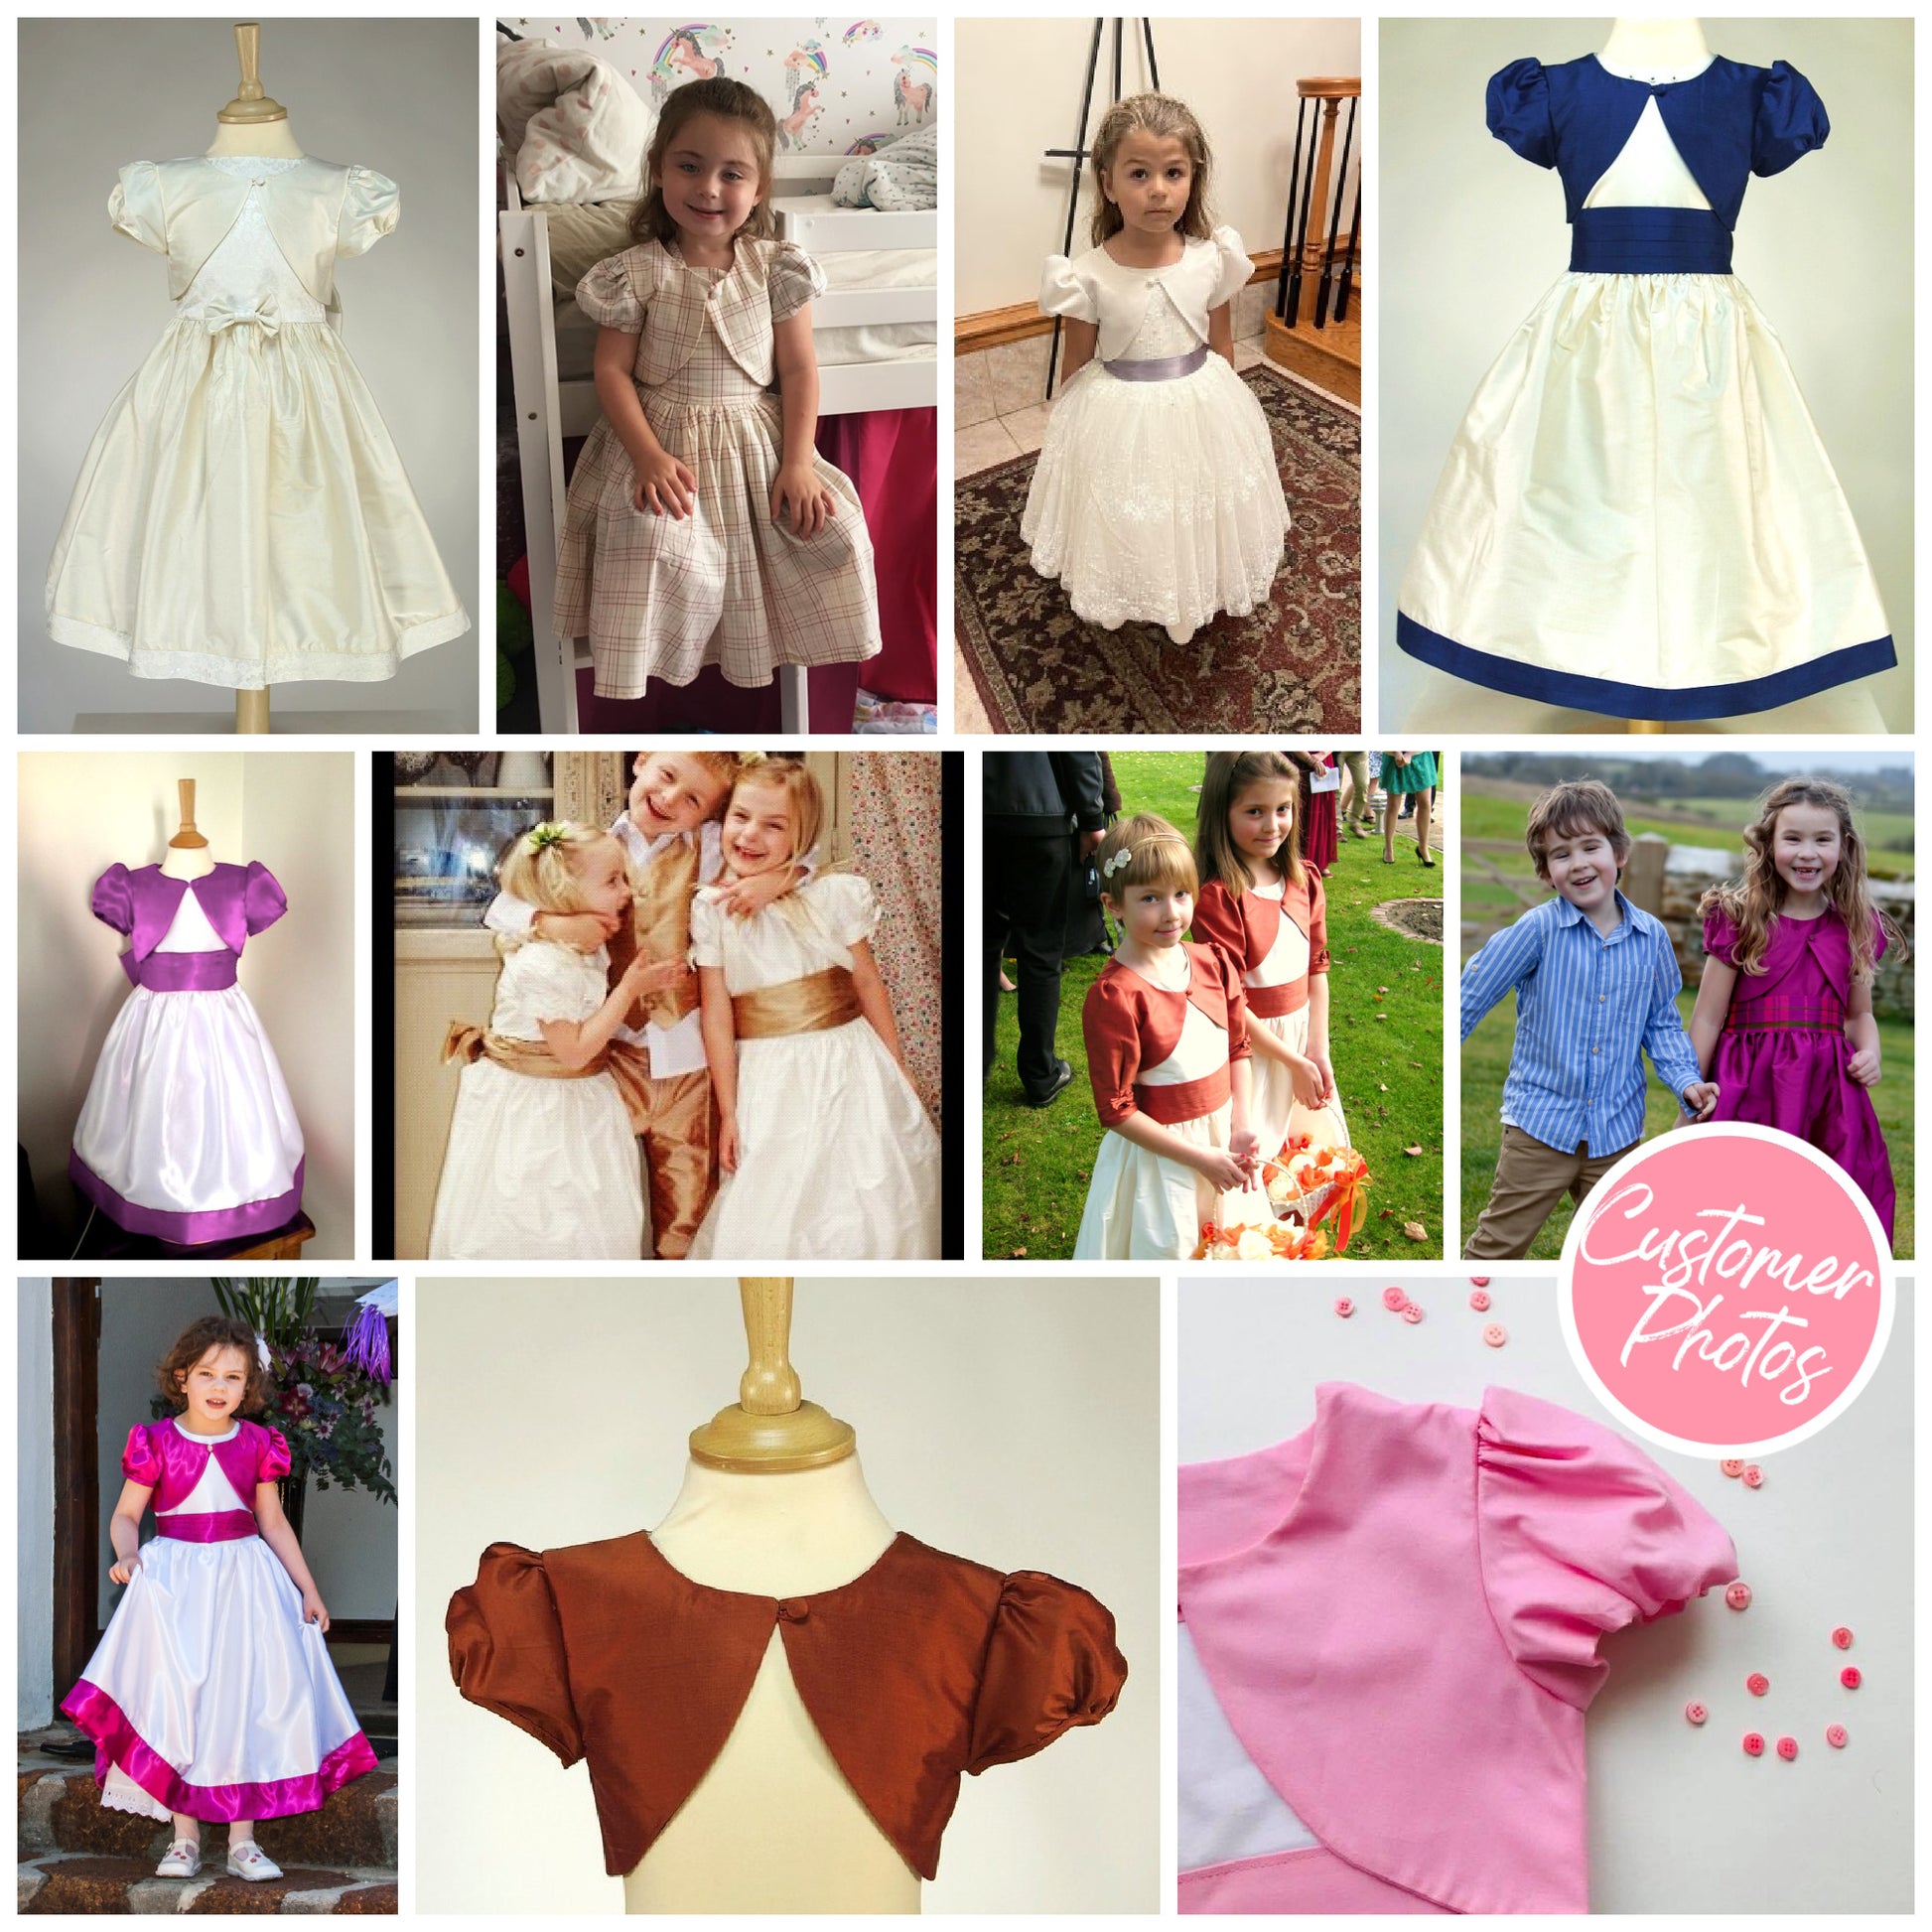
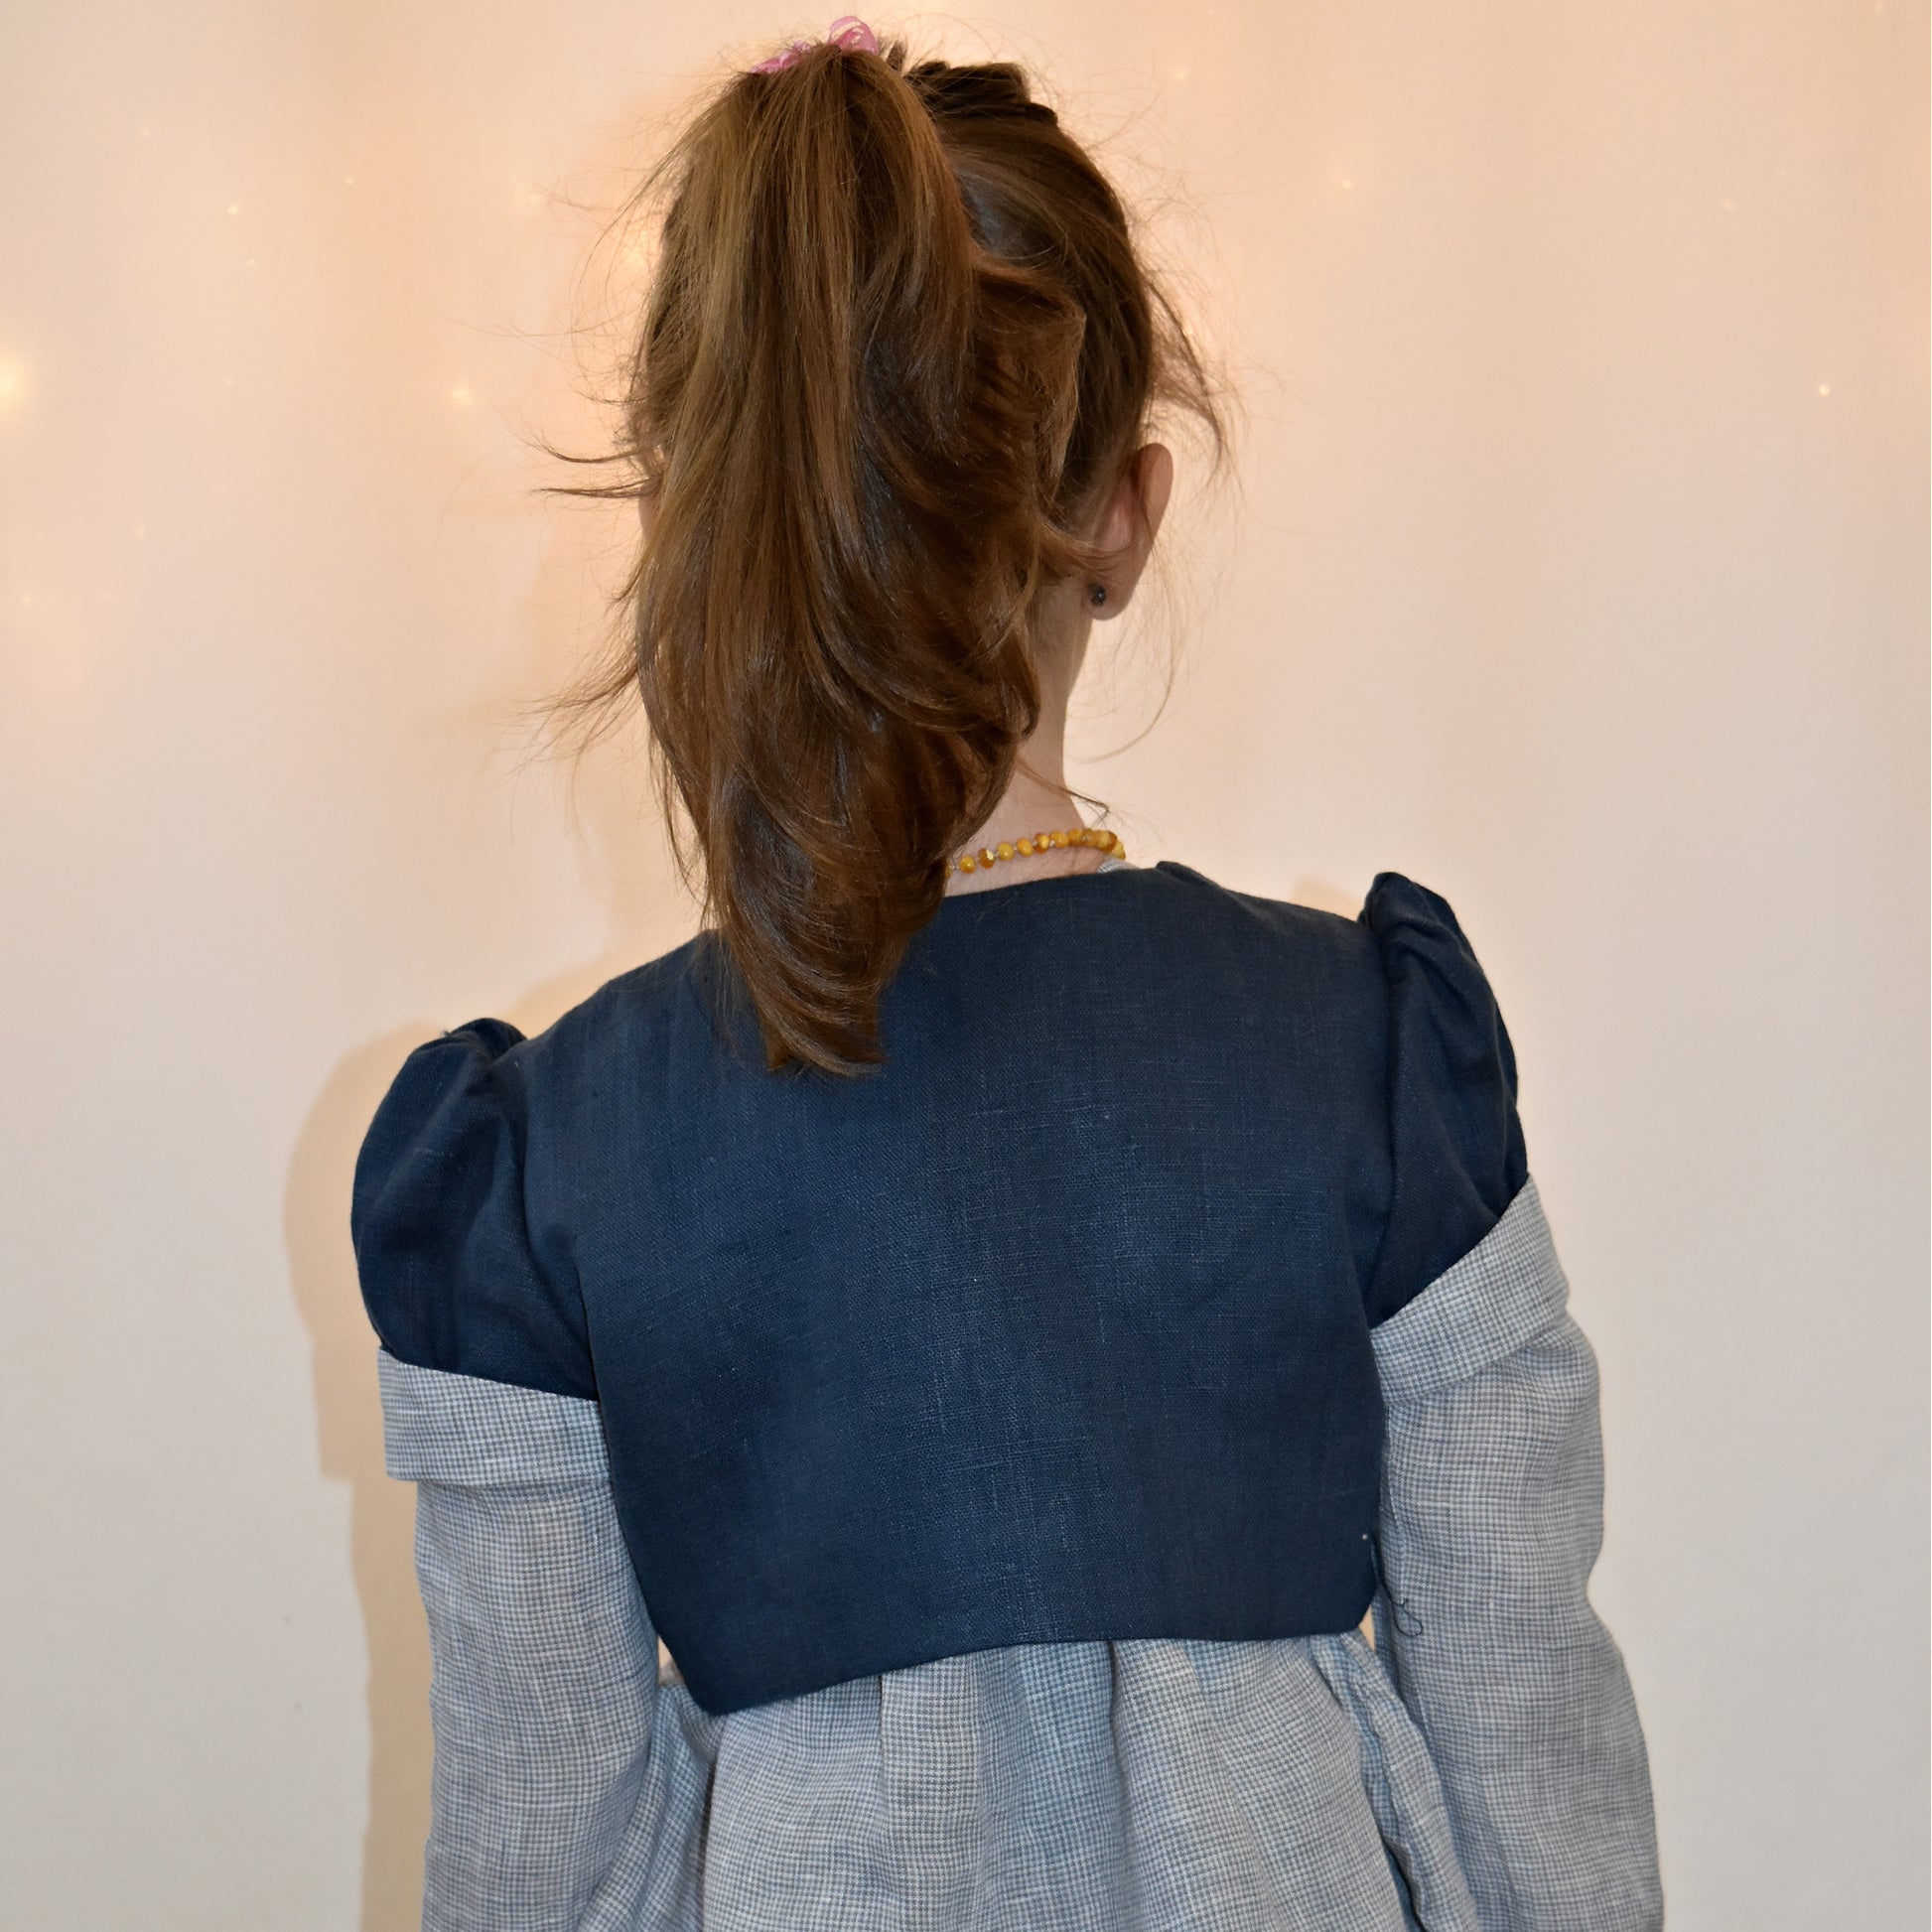
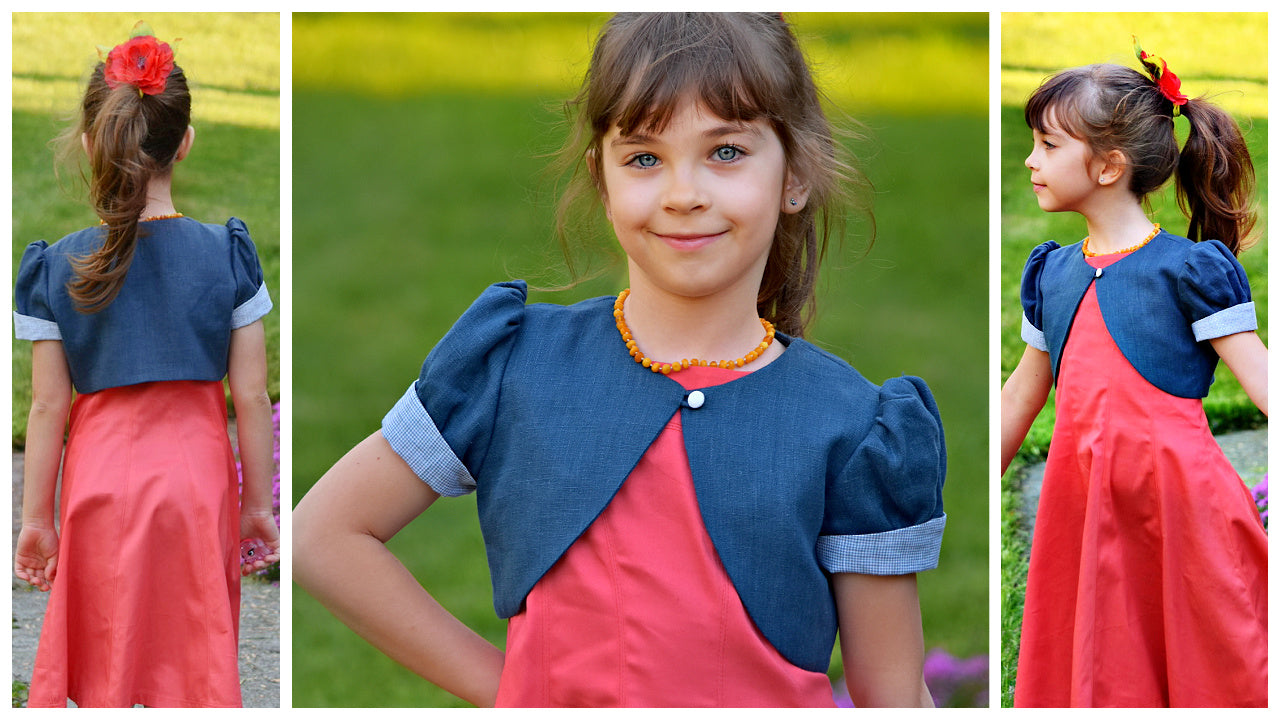
Bolero Jacket with Puff Sleeves
Transcript for video: Classic Bolero - Step-by-Step Tutorial
Introduction and Materials
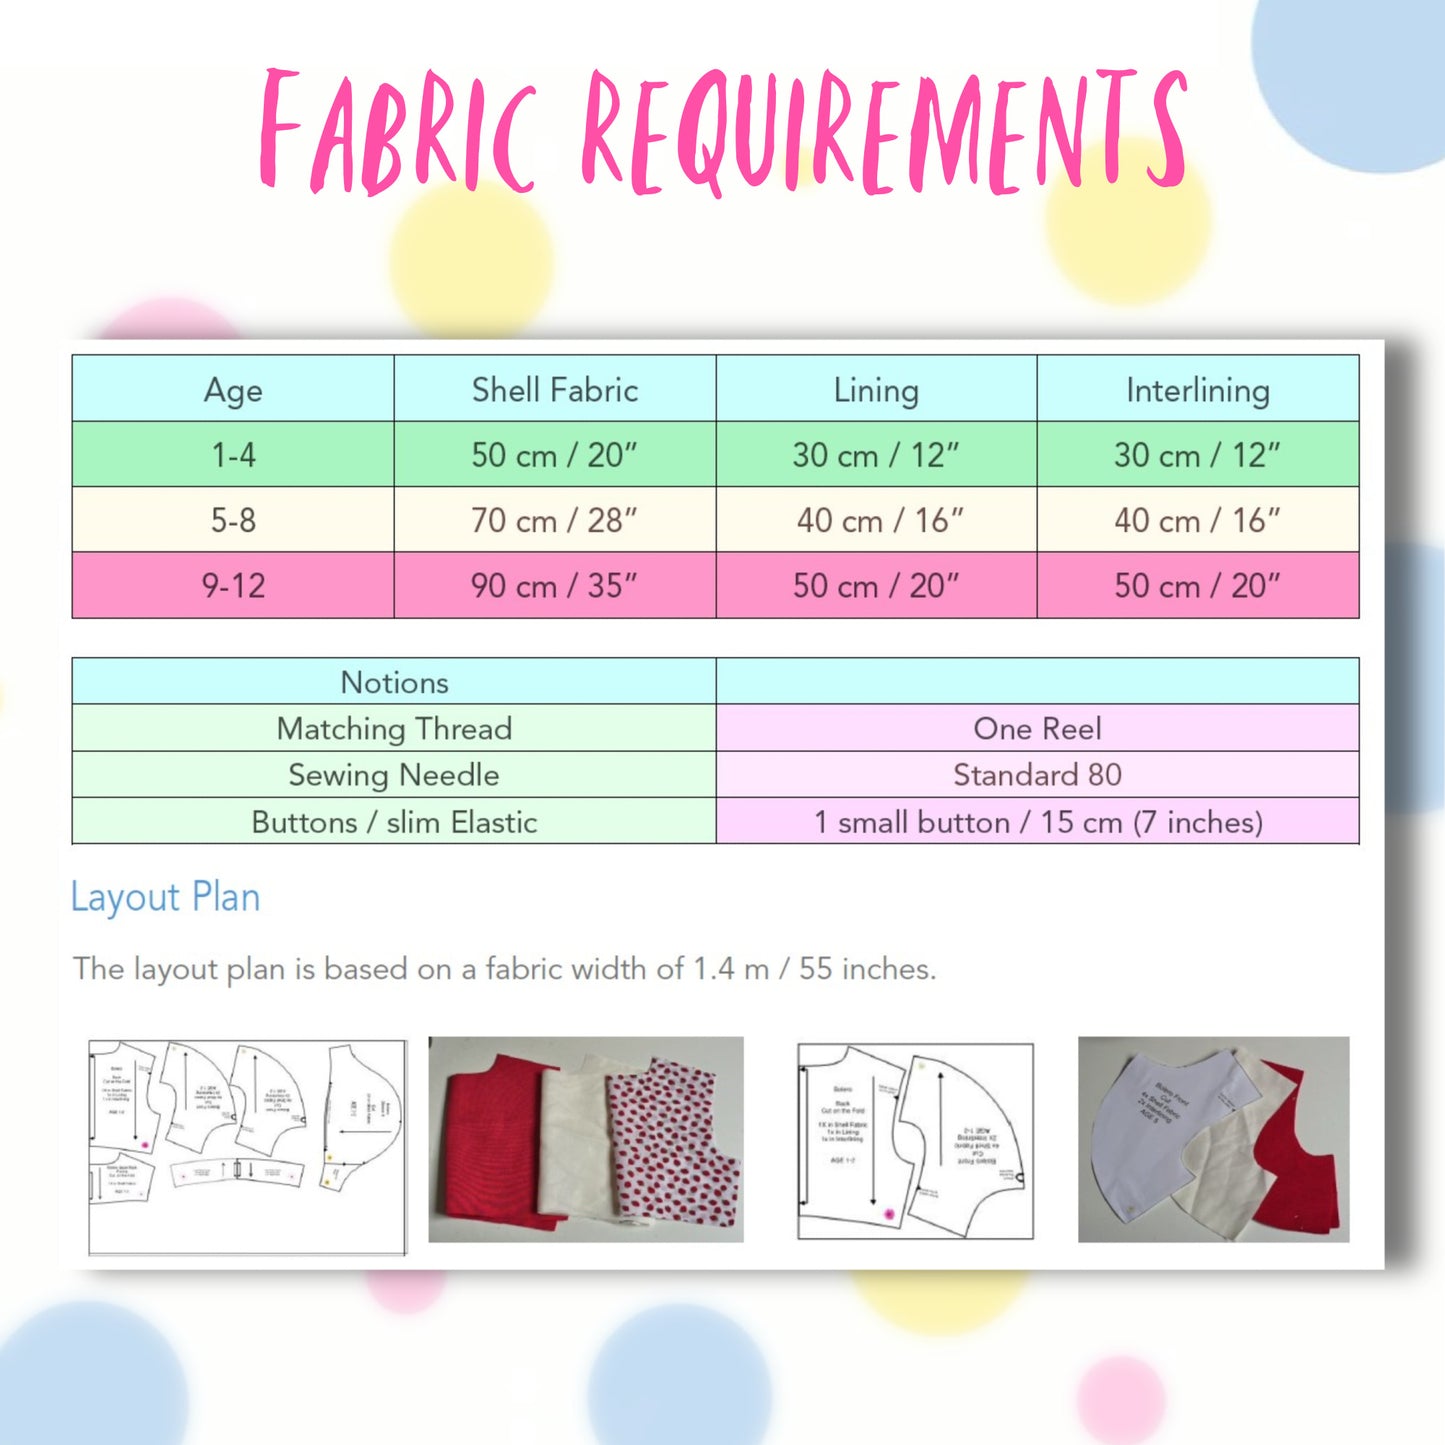
In this video, I’m going to show you how to make a classic Bolero jacket with puff sleeves. For this jacket, you will need outer fabric for the shell, lining fabric which can be a contrast if you like, and interlining. I am not using any Vilene for this project.
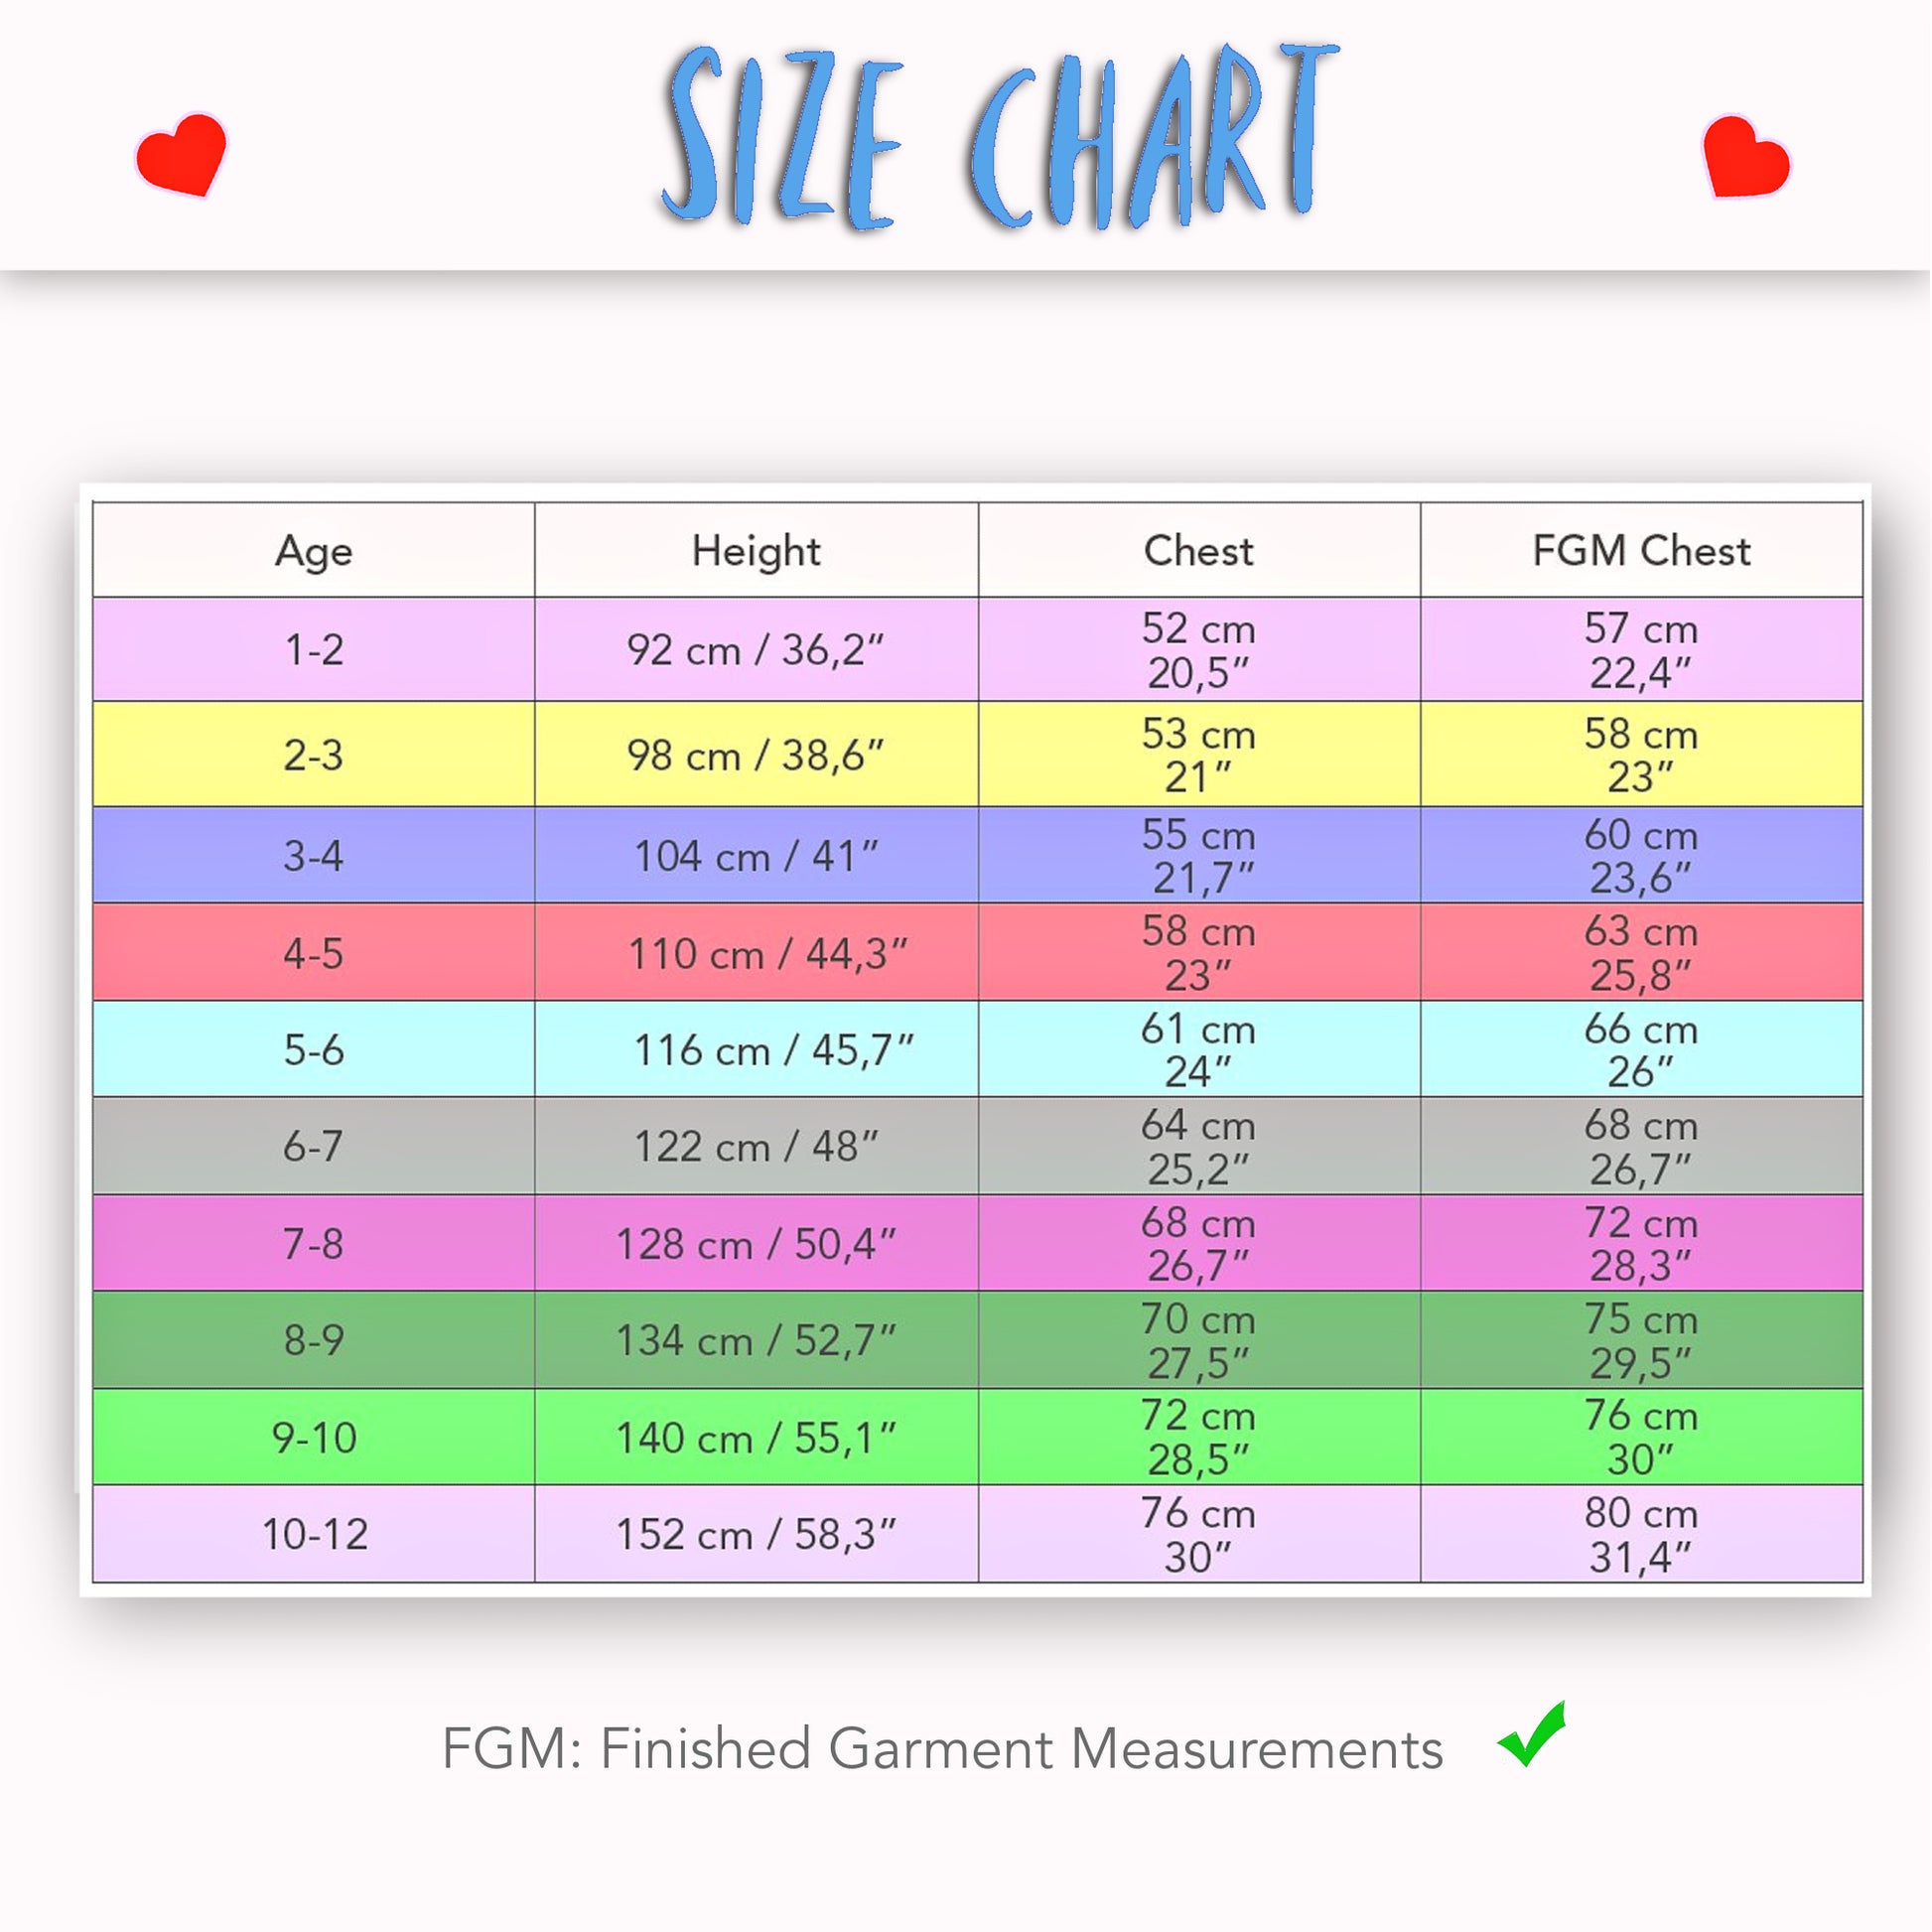
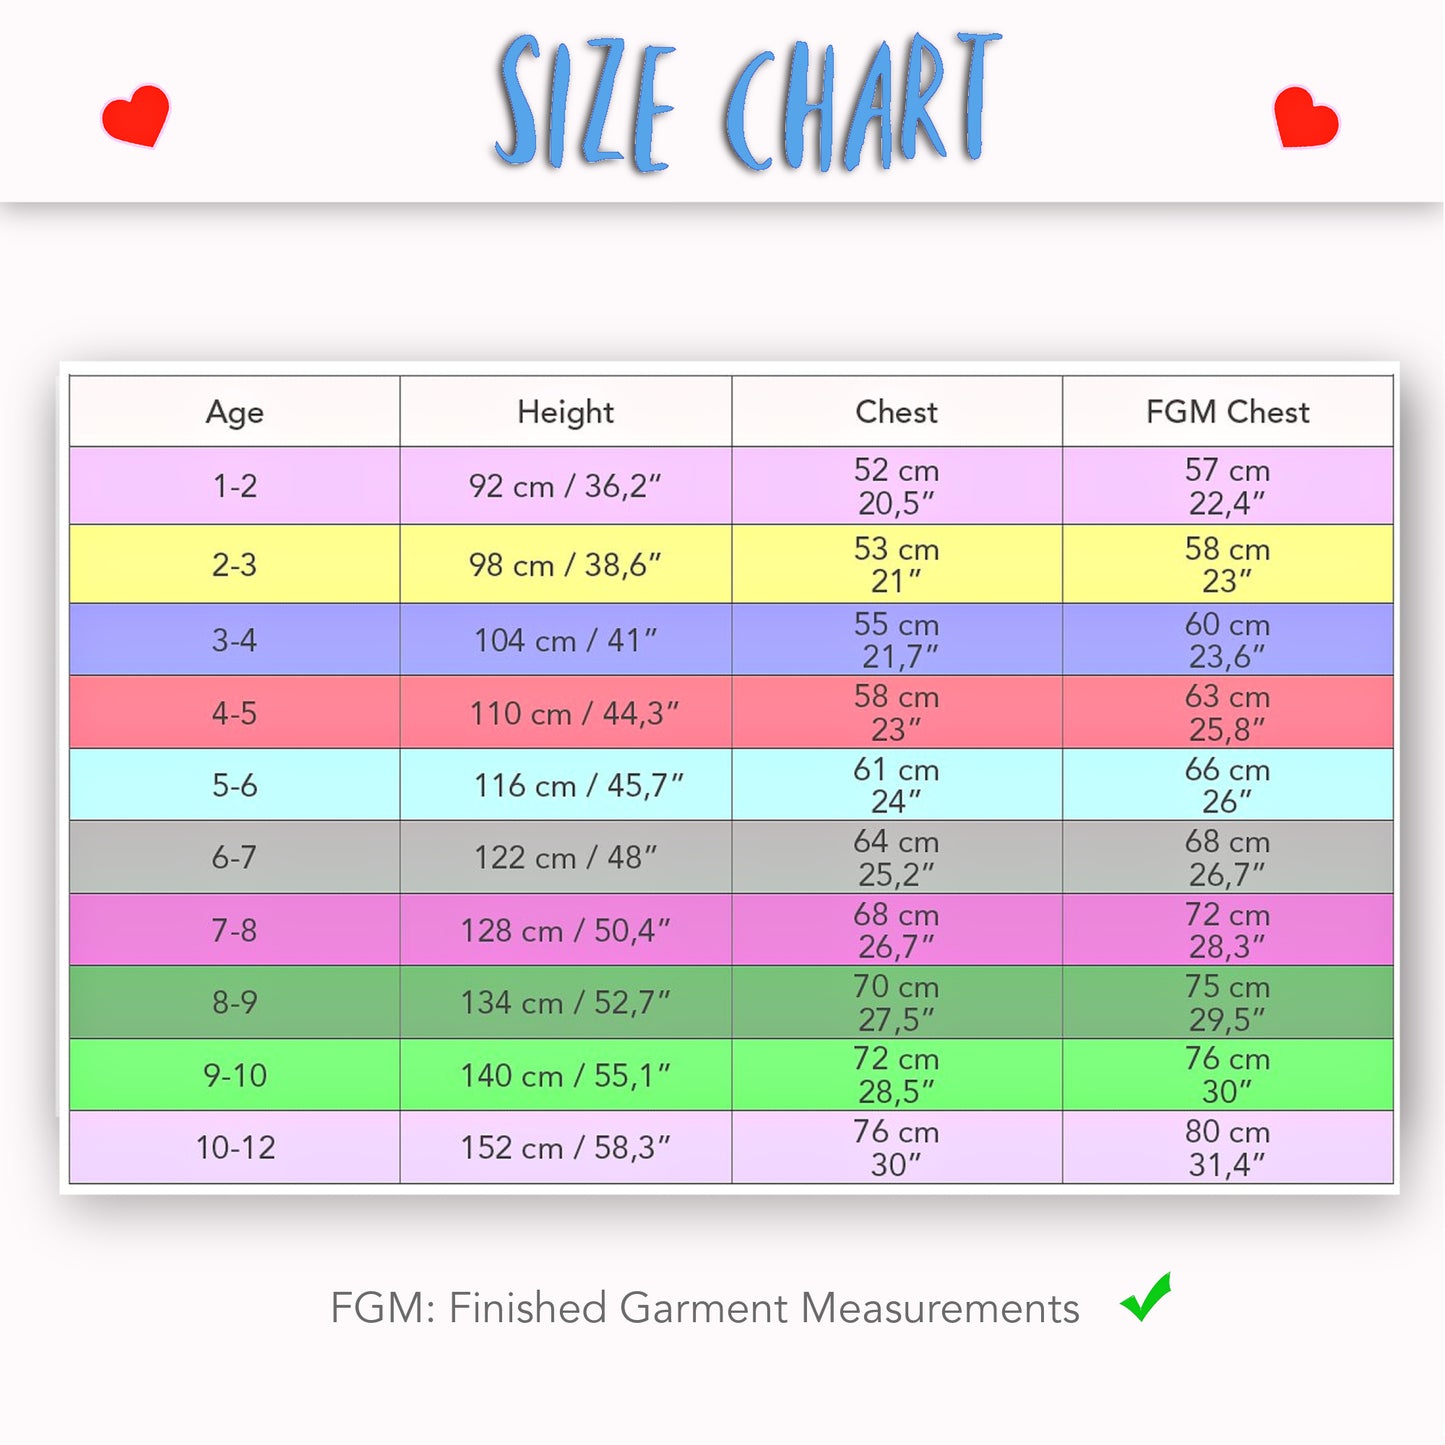
Make sure your pattern scale is correct so you are working with the right size. There are seven pattern pieces in total.
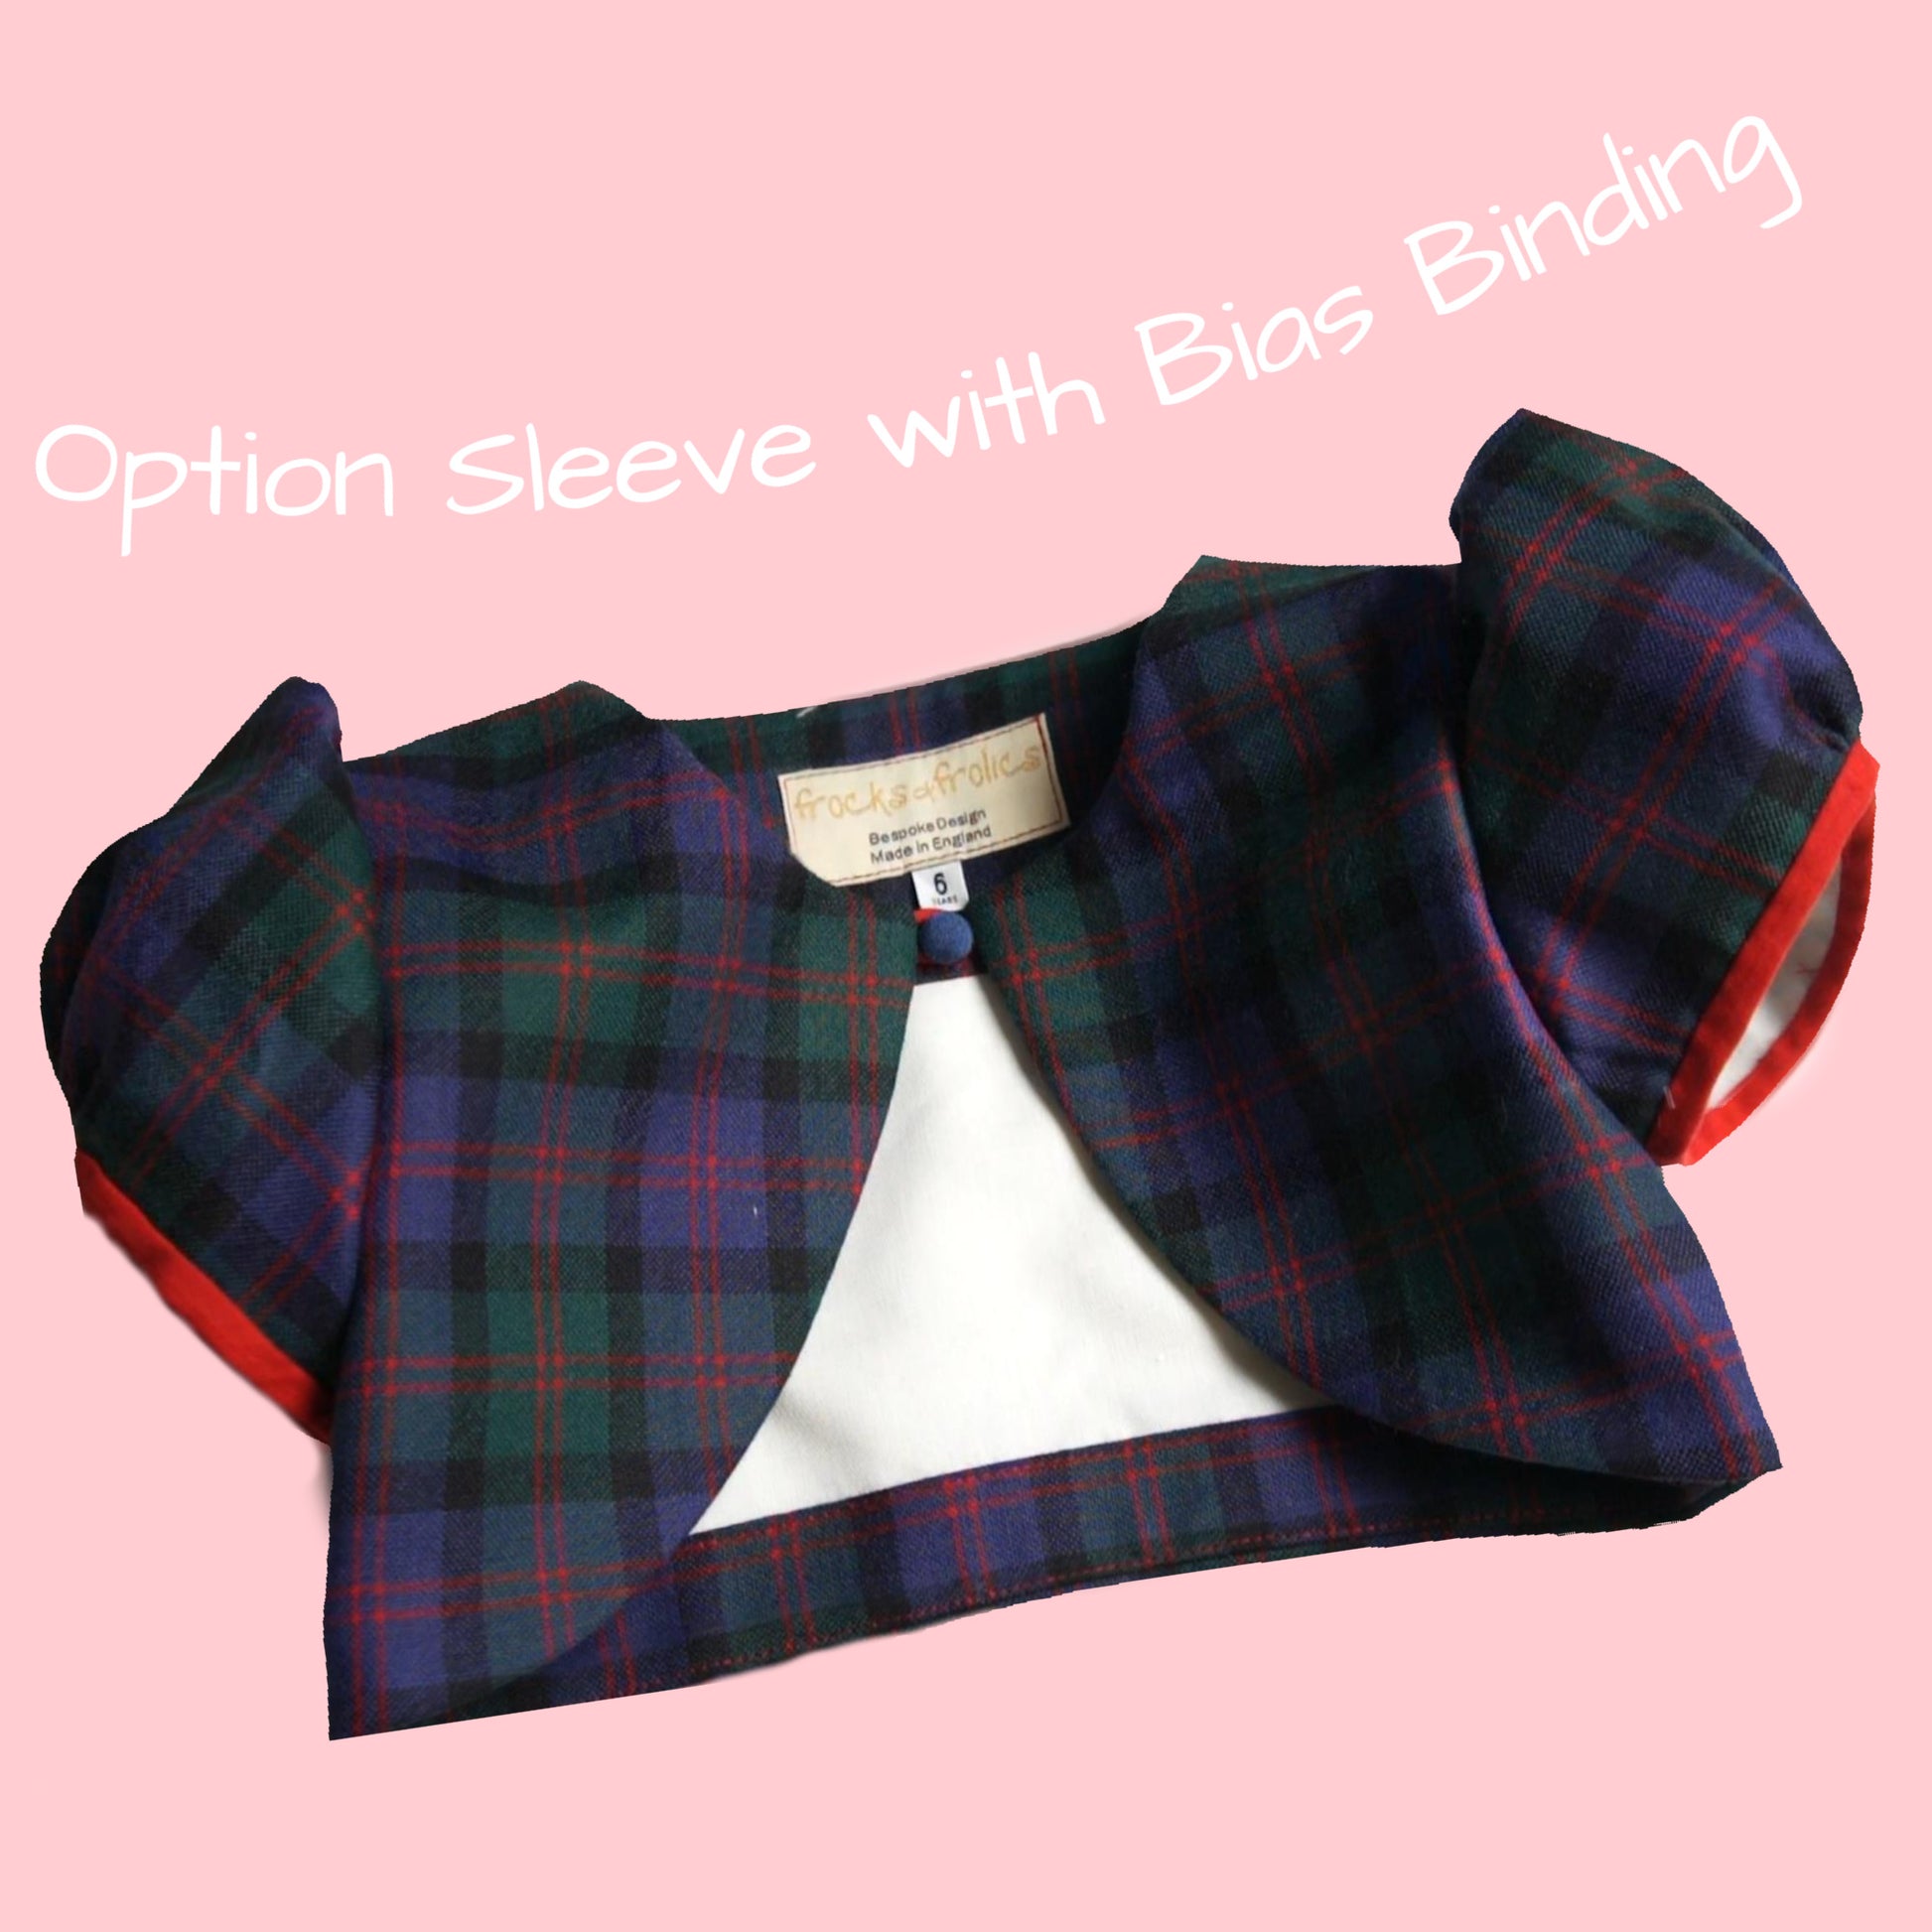
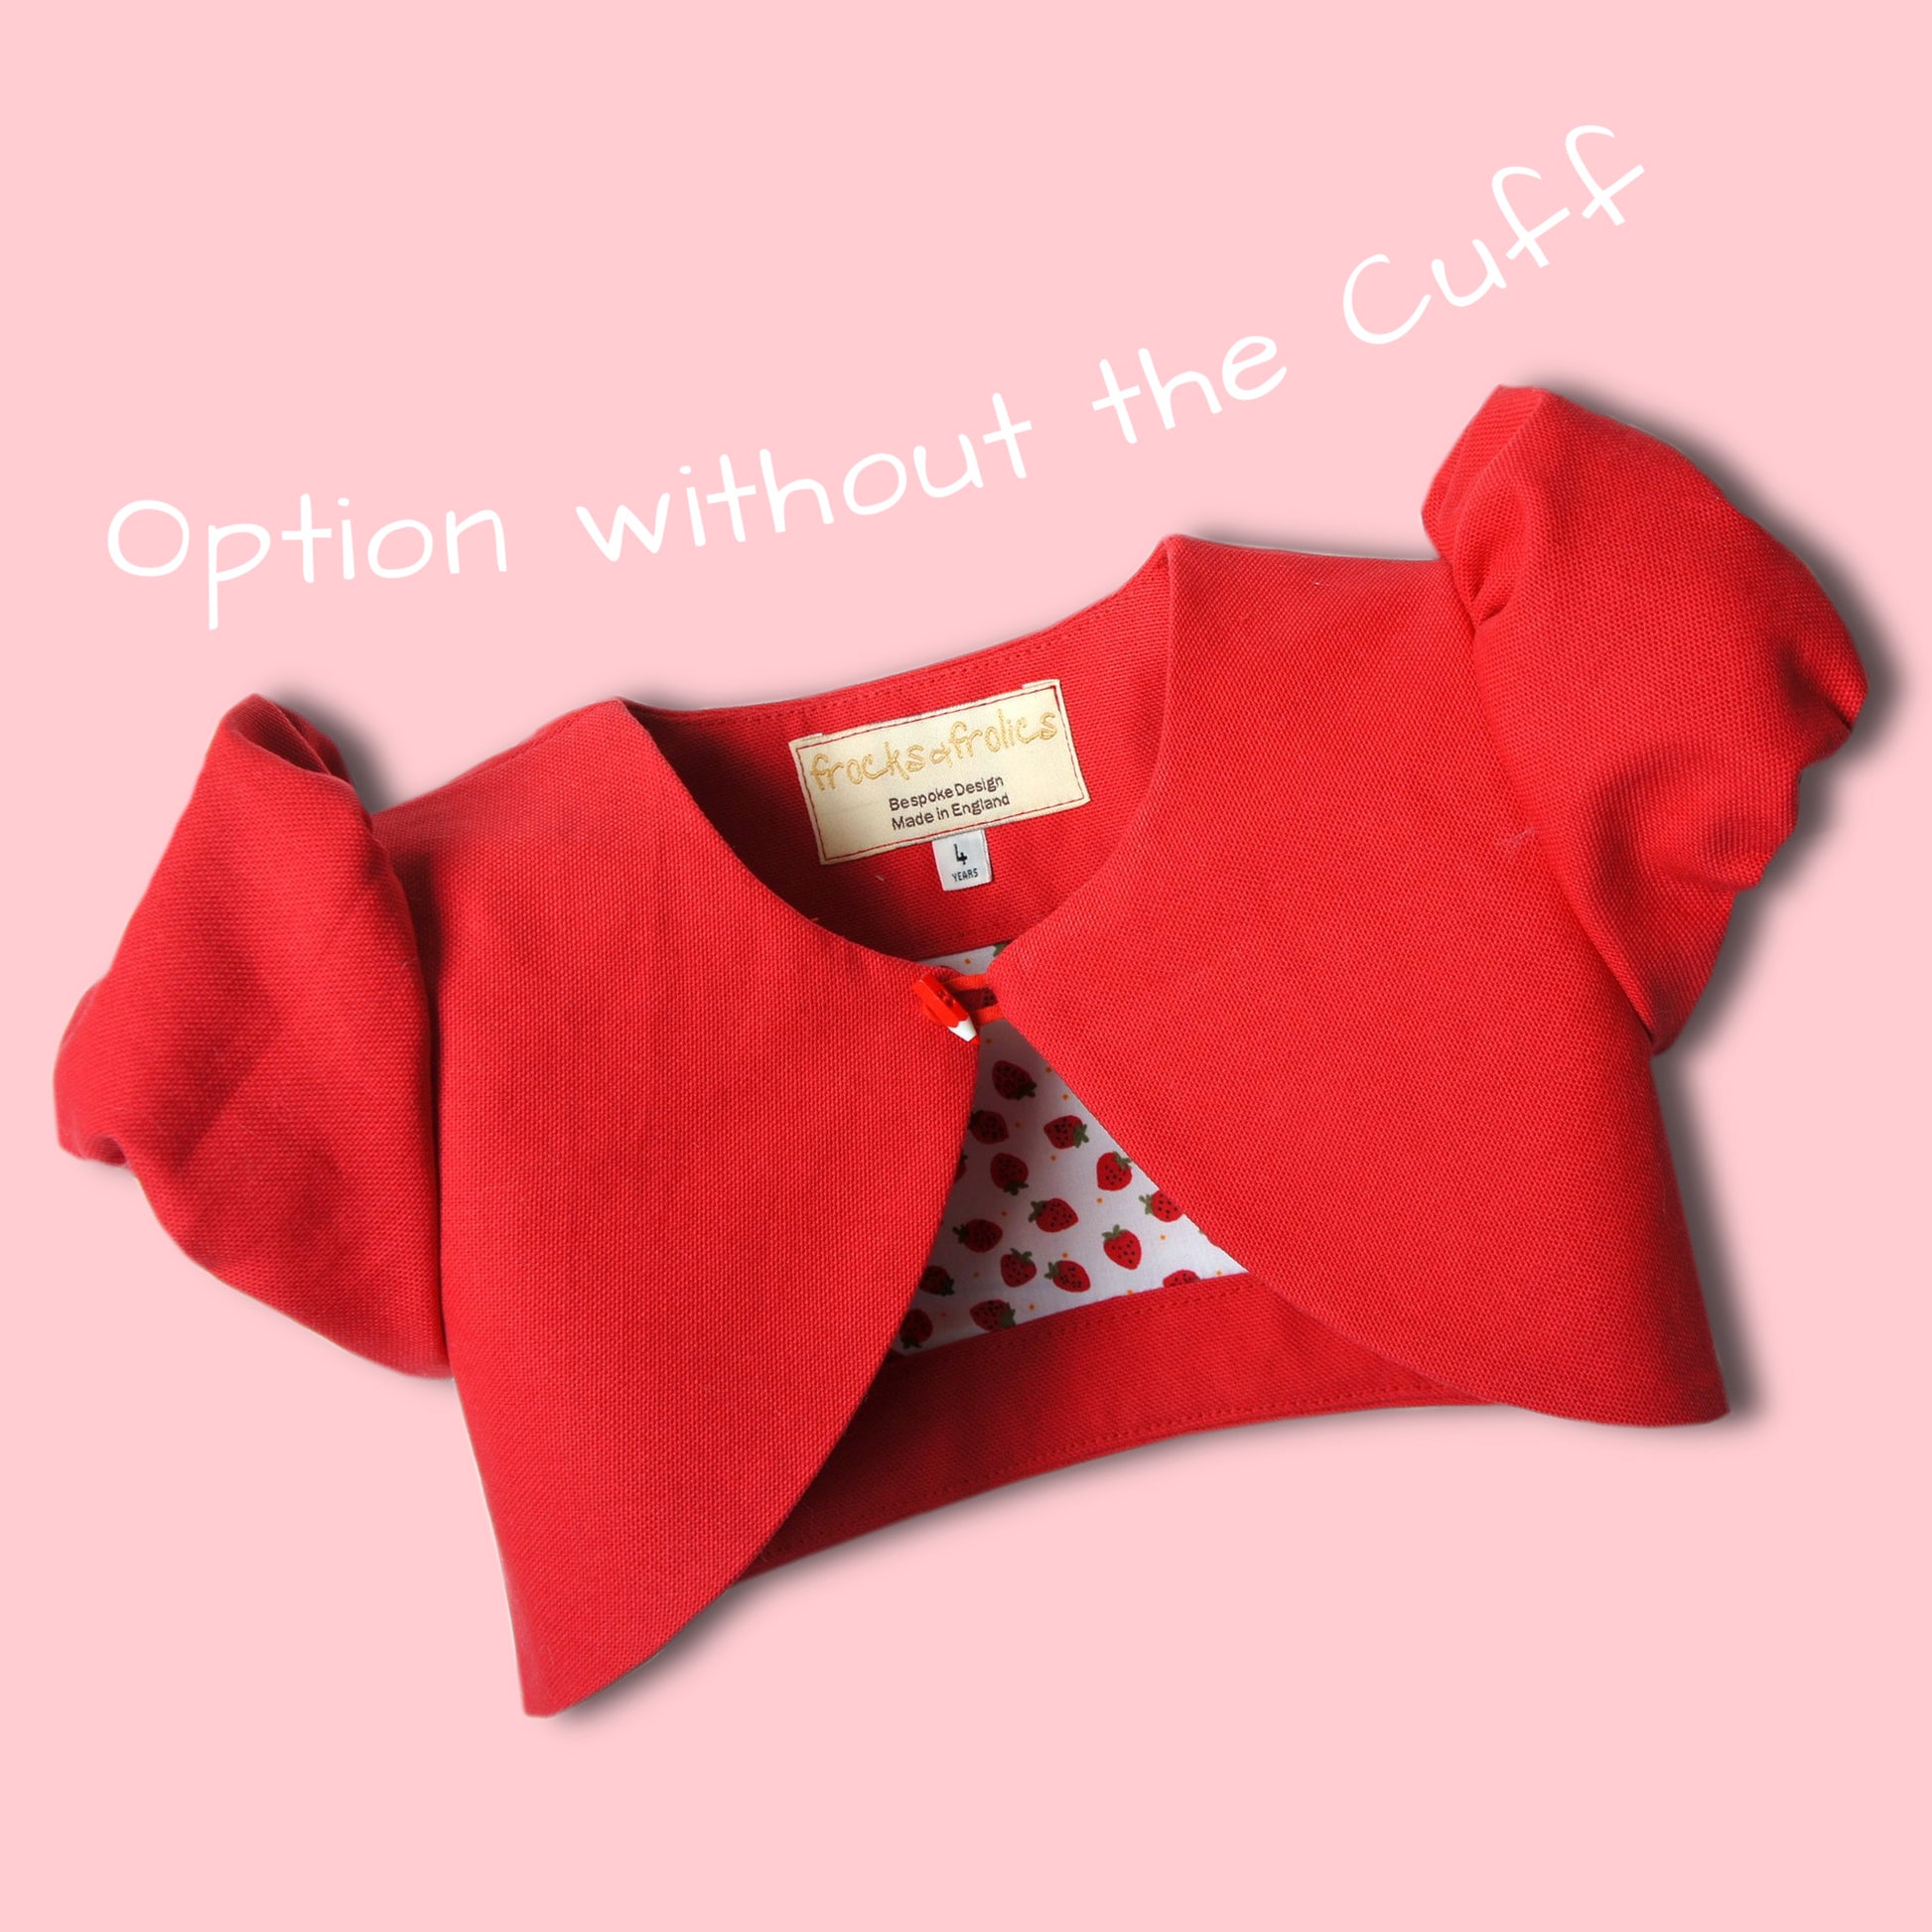
The sleeves are the only pieces that need to be assembled from multiple parts. There are two sleeve patterns, one for the shell and one for the lining. The lining sleeve is slightly smaller than the shell sleeve. This is intentional so that the bubble hem sits slightly inward rather than on the edge.
Pattern Pieces and Cutting Overview
For the back, which is cut on the fold, you also have facings. These facings are placed onto the back using guide markings, which I will show you how to transfer later. This small template piece helps with accurate placement.
The front is cut four times in total. First, cut it four times in the outer fabric so you end up with two pairs. It is important to mark where the gathers will go at this stage so you do not forget later when construction begins.
You will also cut two pieces in interlining, which I am making from curtain lining.
Back, Facings, and Marking
The back is cut on the fold in the outer fabric, lining, and interlining. I layer them and cut them together to save time. After cutting, I mark again where the gathers will go, which is approximately four centimetres on either side of the shoulder seam.
Next are the upper and lower back facings. These are also cut on the fold. The small guide piece helps ensure accurate placement so that when folded and sewn, everything aligns neatly with the edge of the lining.
I sew along the marked line, or you can use an invisible fabric pen. After sewing, I top stitch from the outside with a longer stitch length. Keep the stitching slightly away from the edge so it does not look homemade.
The same process is repeated for the lower facing. You can press it first if you prefer, although it is not strictly necessary. I also add my label at this stage.
Assembling the Shell and Lining
Now we move on to the front pieces. I attach the interlining to the shell fabric. I do not sew all the way around as I used to, because it is not necessary and saves time.
The same process is repeated for the lining and the shell. Then I sew the side seams for both layers separately.
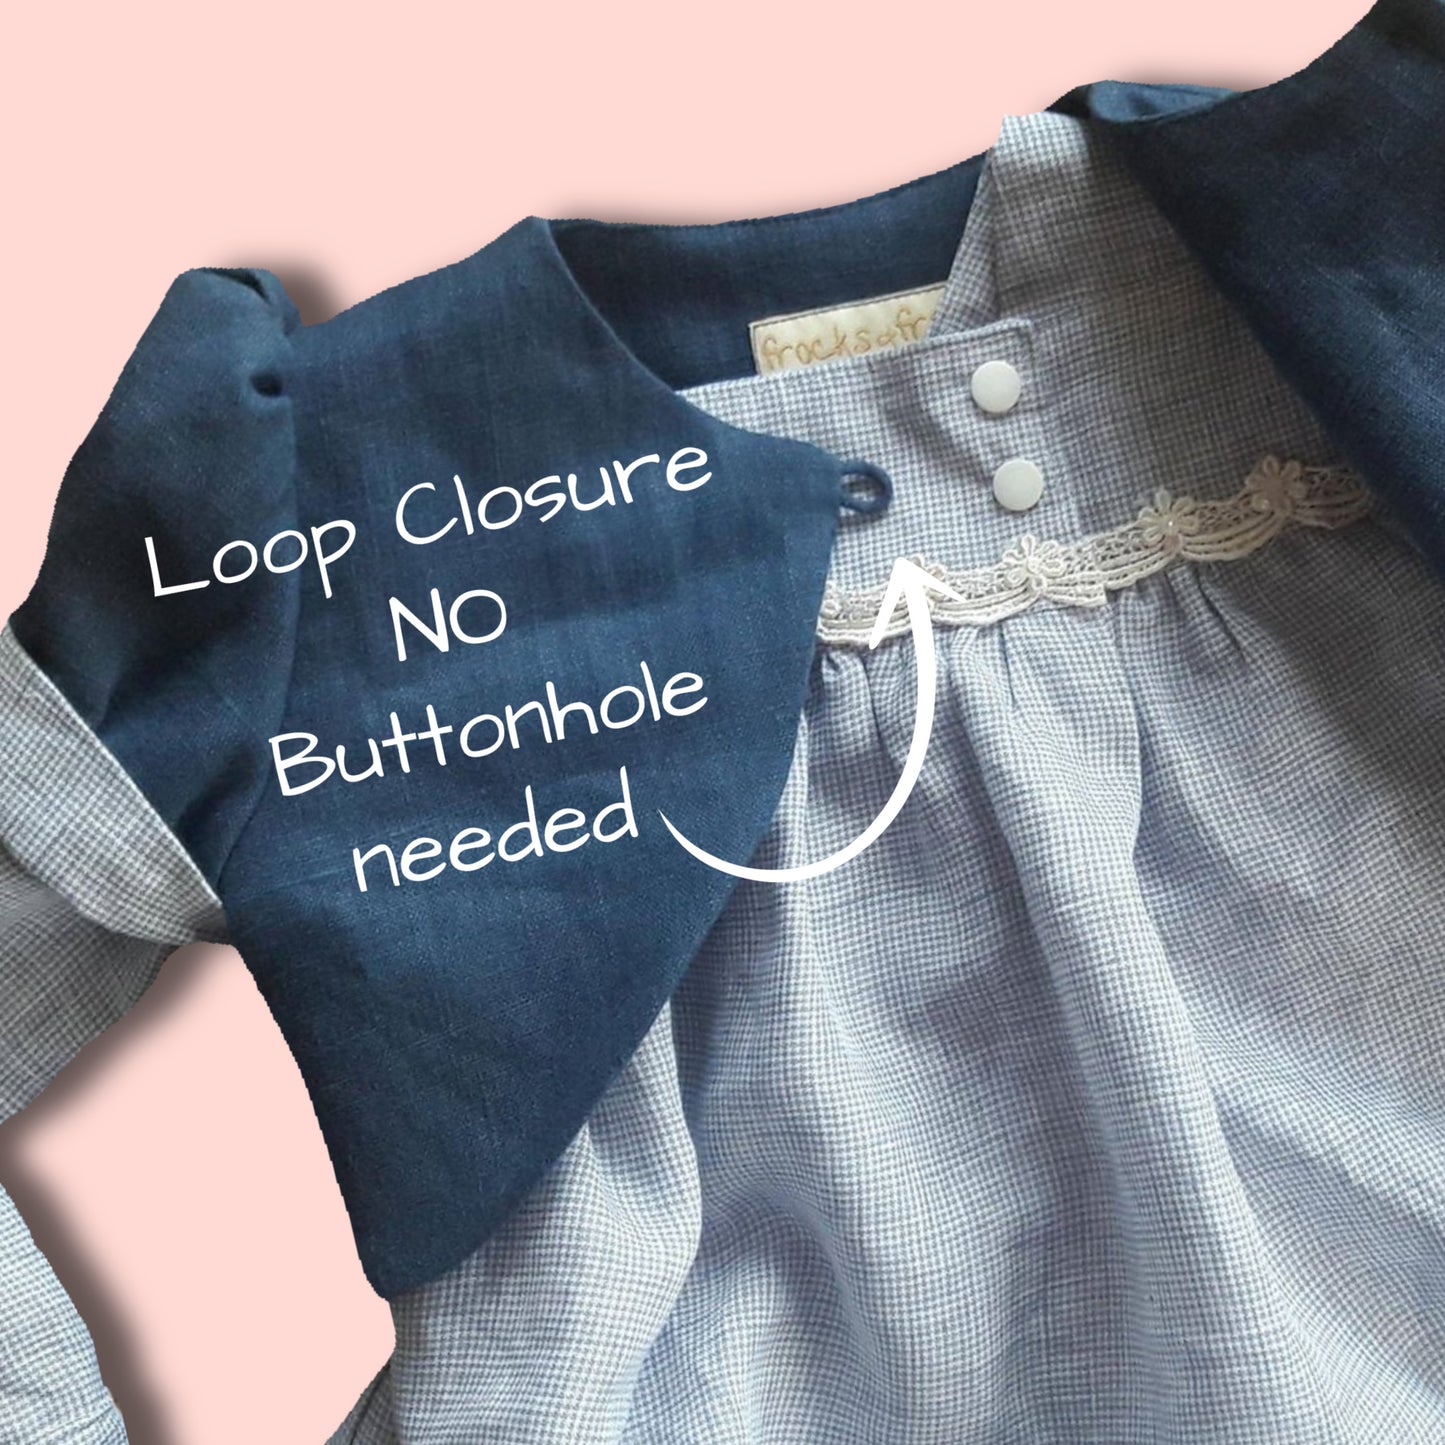
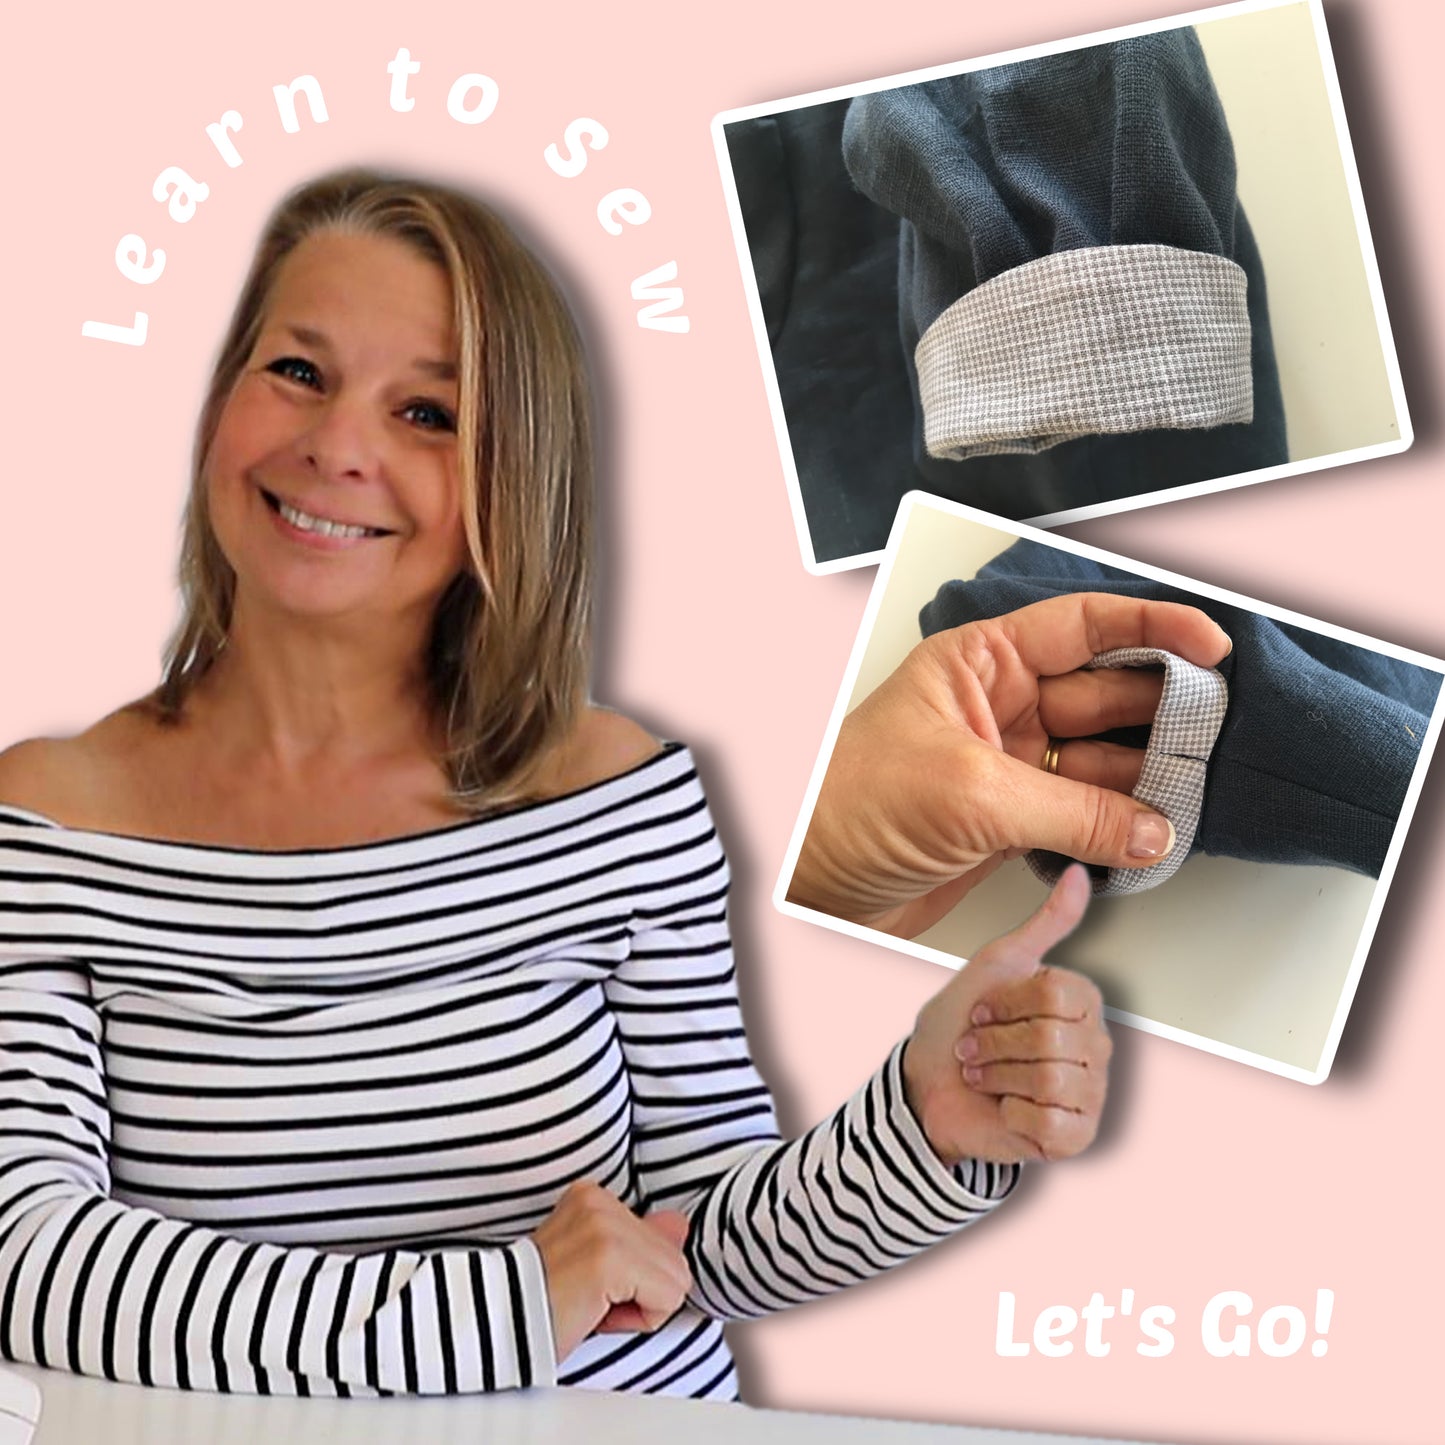
Rulo Loop Construction
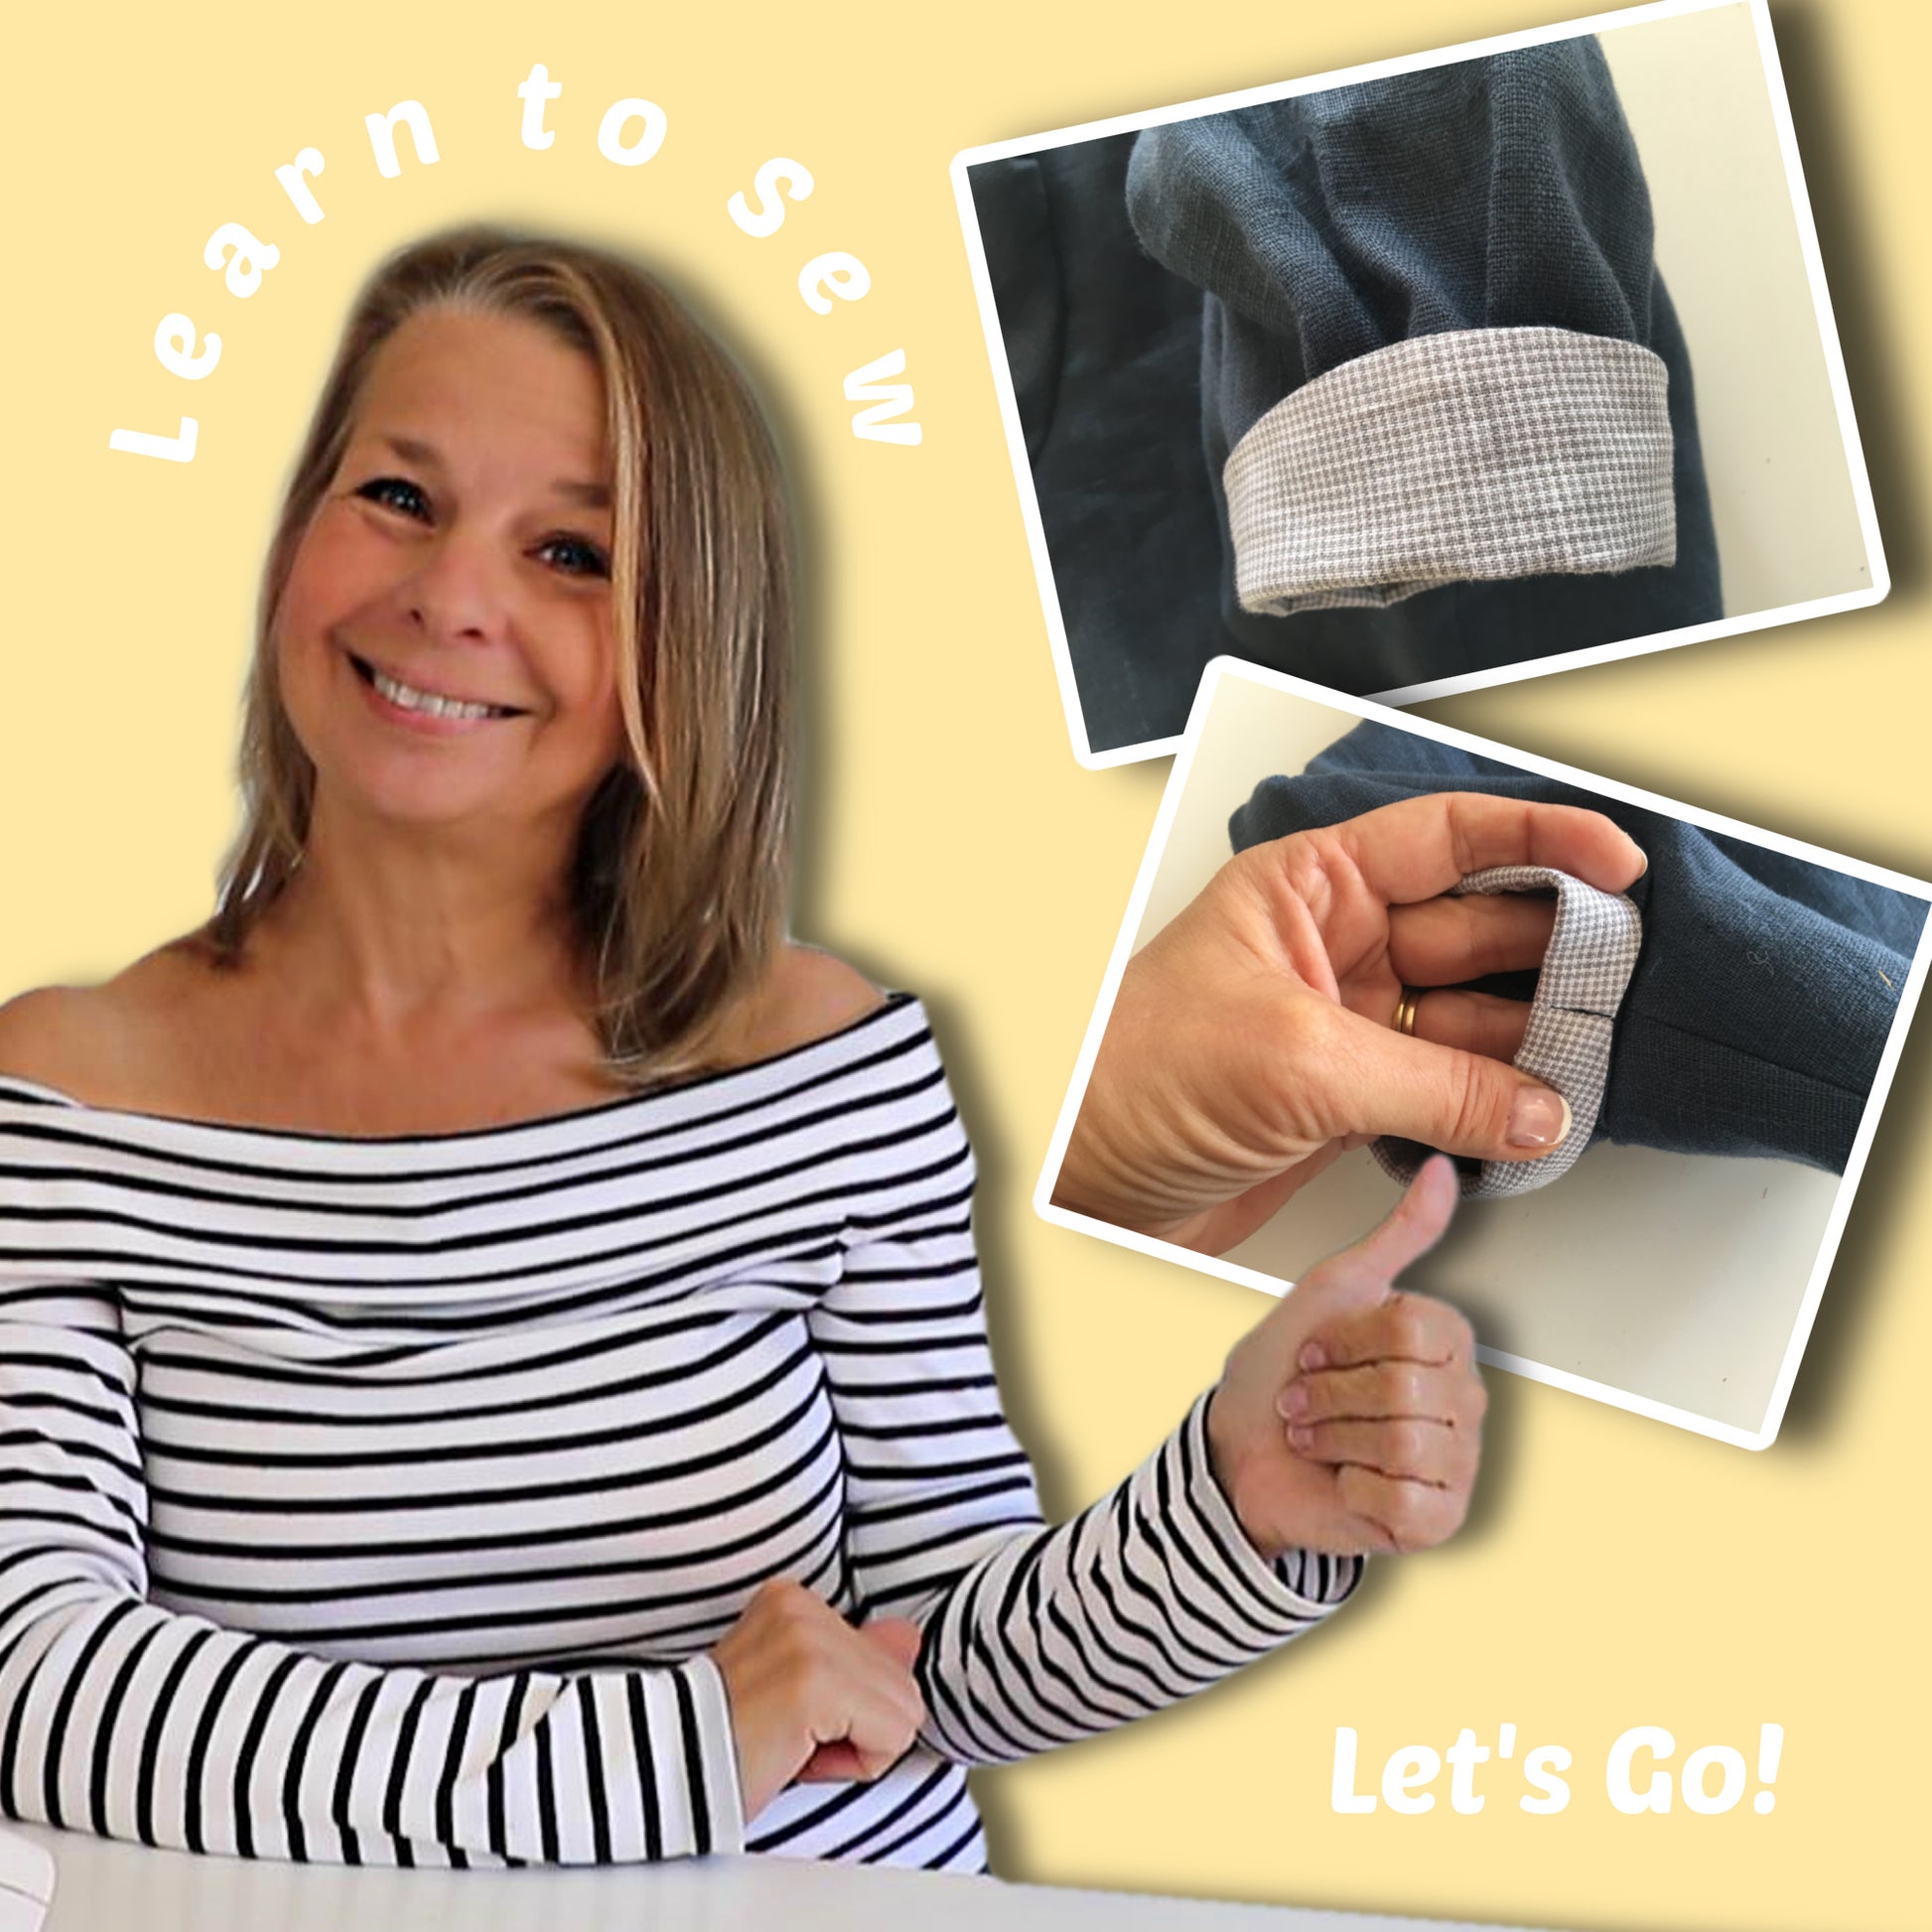
Now we prepare a Rulo loop. I am using bias binding because my linen fabric is too thick to form a tube easily.
First, I press the bias binding flat. Then I insert piping cord into the edge and sew it using a piping foot. After sewing, I trim it back carefully without cutting too close.
Since I do not have a fabric turning tool with me, I use a hand method. I secure a double thread at the end and gently pull it through to turn the loop right side out. This takes patience but works well for a single loop.
Attaching the Loop and Neckline Construction
The loop is placed on the right side of the jacket. I pin the seams together, folding the edges neatly.
Then I sew around the neckline and front edge with a one centimetre seam allowance. The most important point is working carefully around the loop, which can easily get caught. It may help to sew the loop in place first before continuing.
After sewing, I trim the corners and reduce bulk, but not too much to avoid fraying. I also clip into curved areas so the fabric can sit smoothly when turned.
Understitching and Finishing the Neckline
Next, I under stitch the seam allowance onto the facing. I stitch about two millimetres from the edge using a longer stitch length.
This step is important because it keeps the neckline flat and prevents the fabric from rolling outwards. It also reduces ironing later and gives a much more professional finish.
Once complete, I trim and adjust the neckline so both sides match. Then I repeat the same process for the back neckline, sewing it with a one centimetre seam allowance.
Because the fabric is thick, I trim it in layers before under stitching again. This ensures everything stays flat and neat.
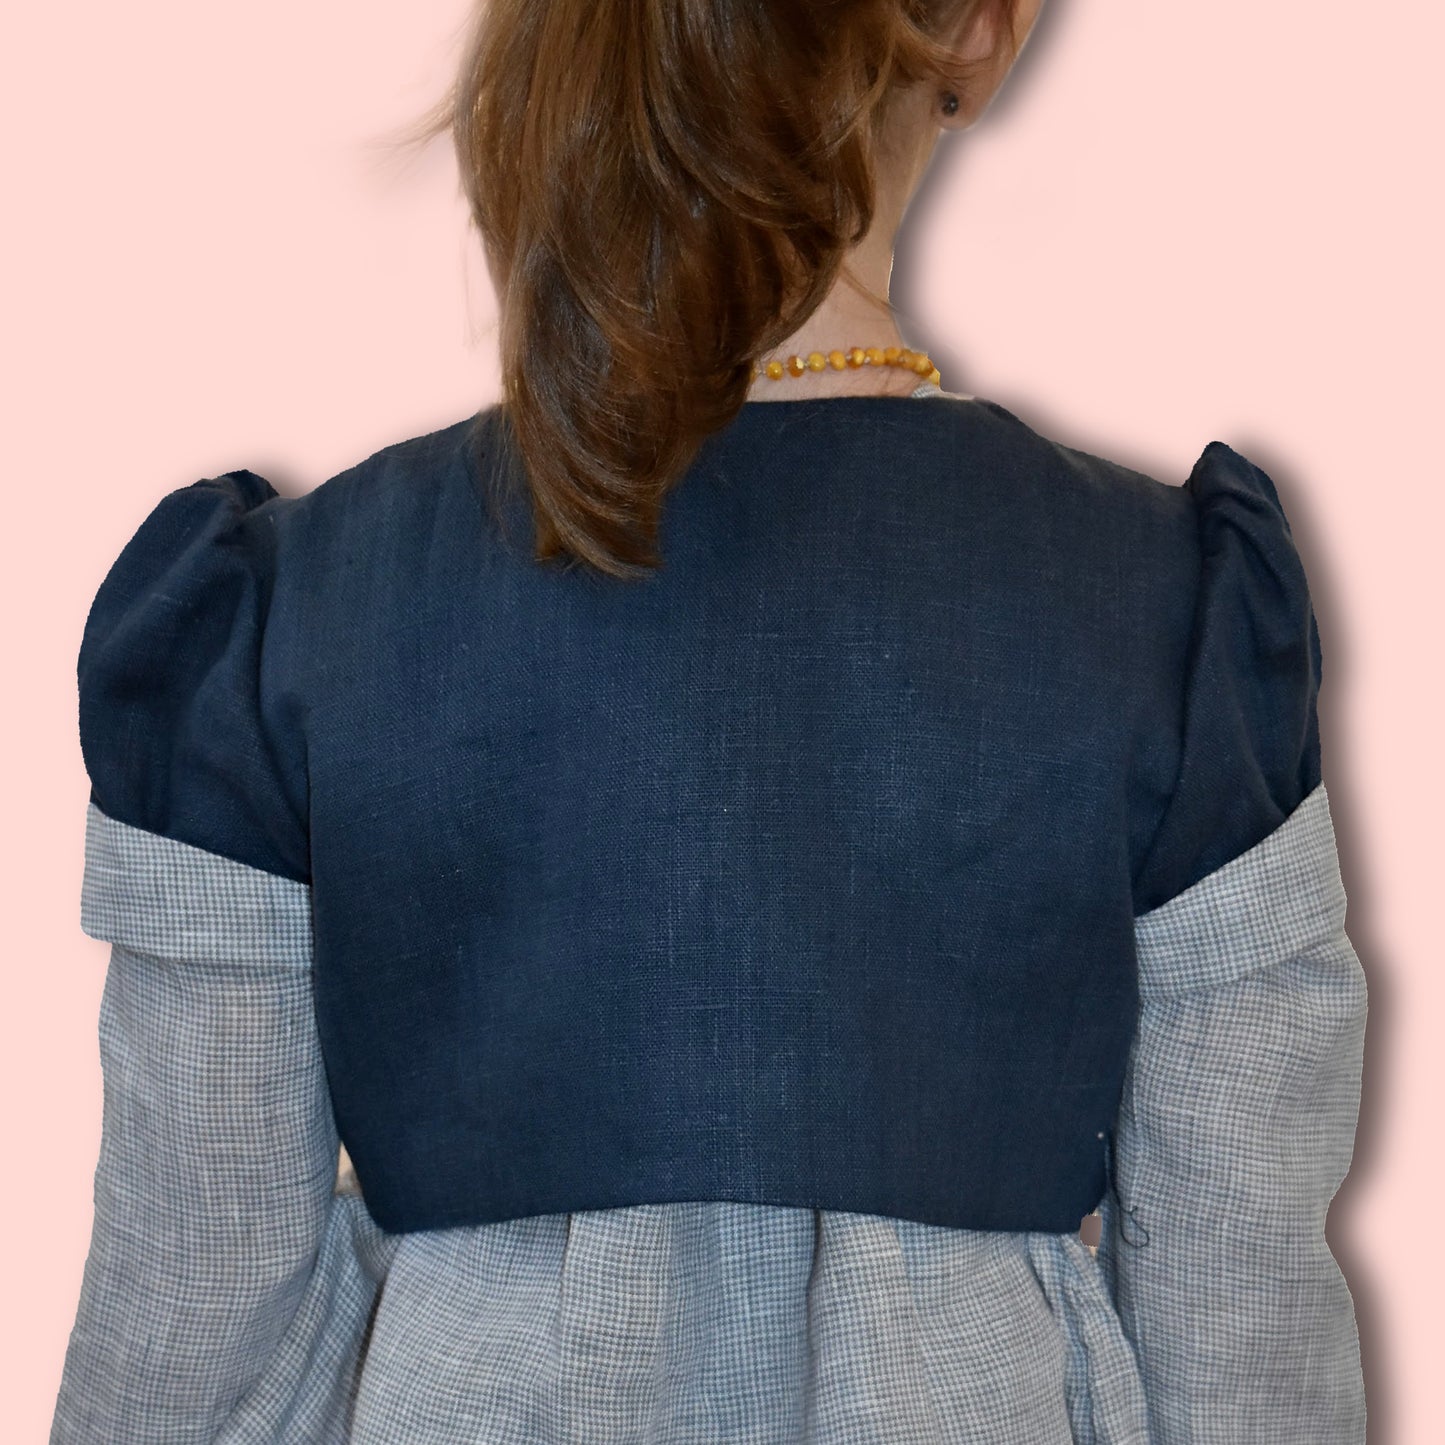
Shoulder Seams and Structure
Now I close the shoulder seams in one step, joining the outer fabric and lining together. After sewing, I finger press the seams open to reduce bulk and trim thicker sections where necessary.
Once pressed, the neckline sits clean and smooth.
Next, I secure the armhole edges by stitching around them lightly. This helps hold everything in place before attaching the sleeves.
Sleeve Preparation and Gathering
The sleeves are made from two parts, shell and lining. The lining sleeve is slightly shorter, so align them edge to edge.
I mark the gathering points, approximately seven centimetres in this example, although your pattern will specify exact measurements.
Then I use a triple zigzag stitch with elastic to create a bubble hem effect. The elastic is stretched as I sew to form soft gathers at the sleeve hem.
This method creates a structured but soft puff shape. You can also under-stitch this section if you want a flatter finish, although it is optional.
Sleeve Construction and Setting In
Next, I sew the sleeve seam with a one centimetre seam allowance and press it open with my fingers.
Then I align the outer and lining layers and pin them together. The sleeve is now ready to be attached.
I sew two rows of gathering stitches at the sleeve head.
To insert the sleeve, I match the front notch to the correct armhole position. The sleeve is pinned from the inside so the shape forms correctly around the arm.
I distribute the gathers evenly, ensuring they sit between the marked points, usually four centimetres from front to back.
Once satisfied with the shape, I sew the sleeve into the armhole using a one centimetre seam allowance.
Finishing the Jacket
Finally, I overlock the seams and attach the button. The button is sewn securely by wrapping the thread several times underneath to create a strong shank.
And that completes the Bolero jacket.
If you would like to make your own, you can get the pattern on Etsy or through my website. Thank you for watching, and I hope you enjoy making your Bolero jacket.