


NATALIE SUN DRESS
NATALIE SUN DRESS


Regular price
$7.50 USD
Regular price
Sale price
$7.50 USD
Unit price
per
Couldn't load pickup availability
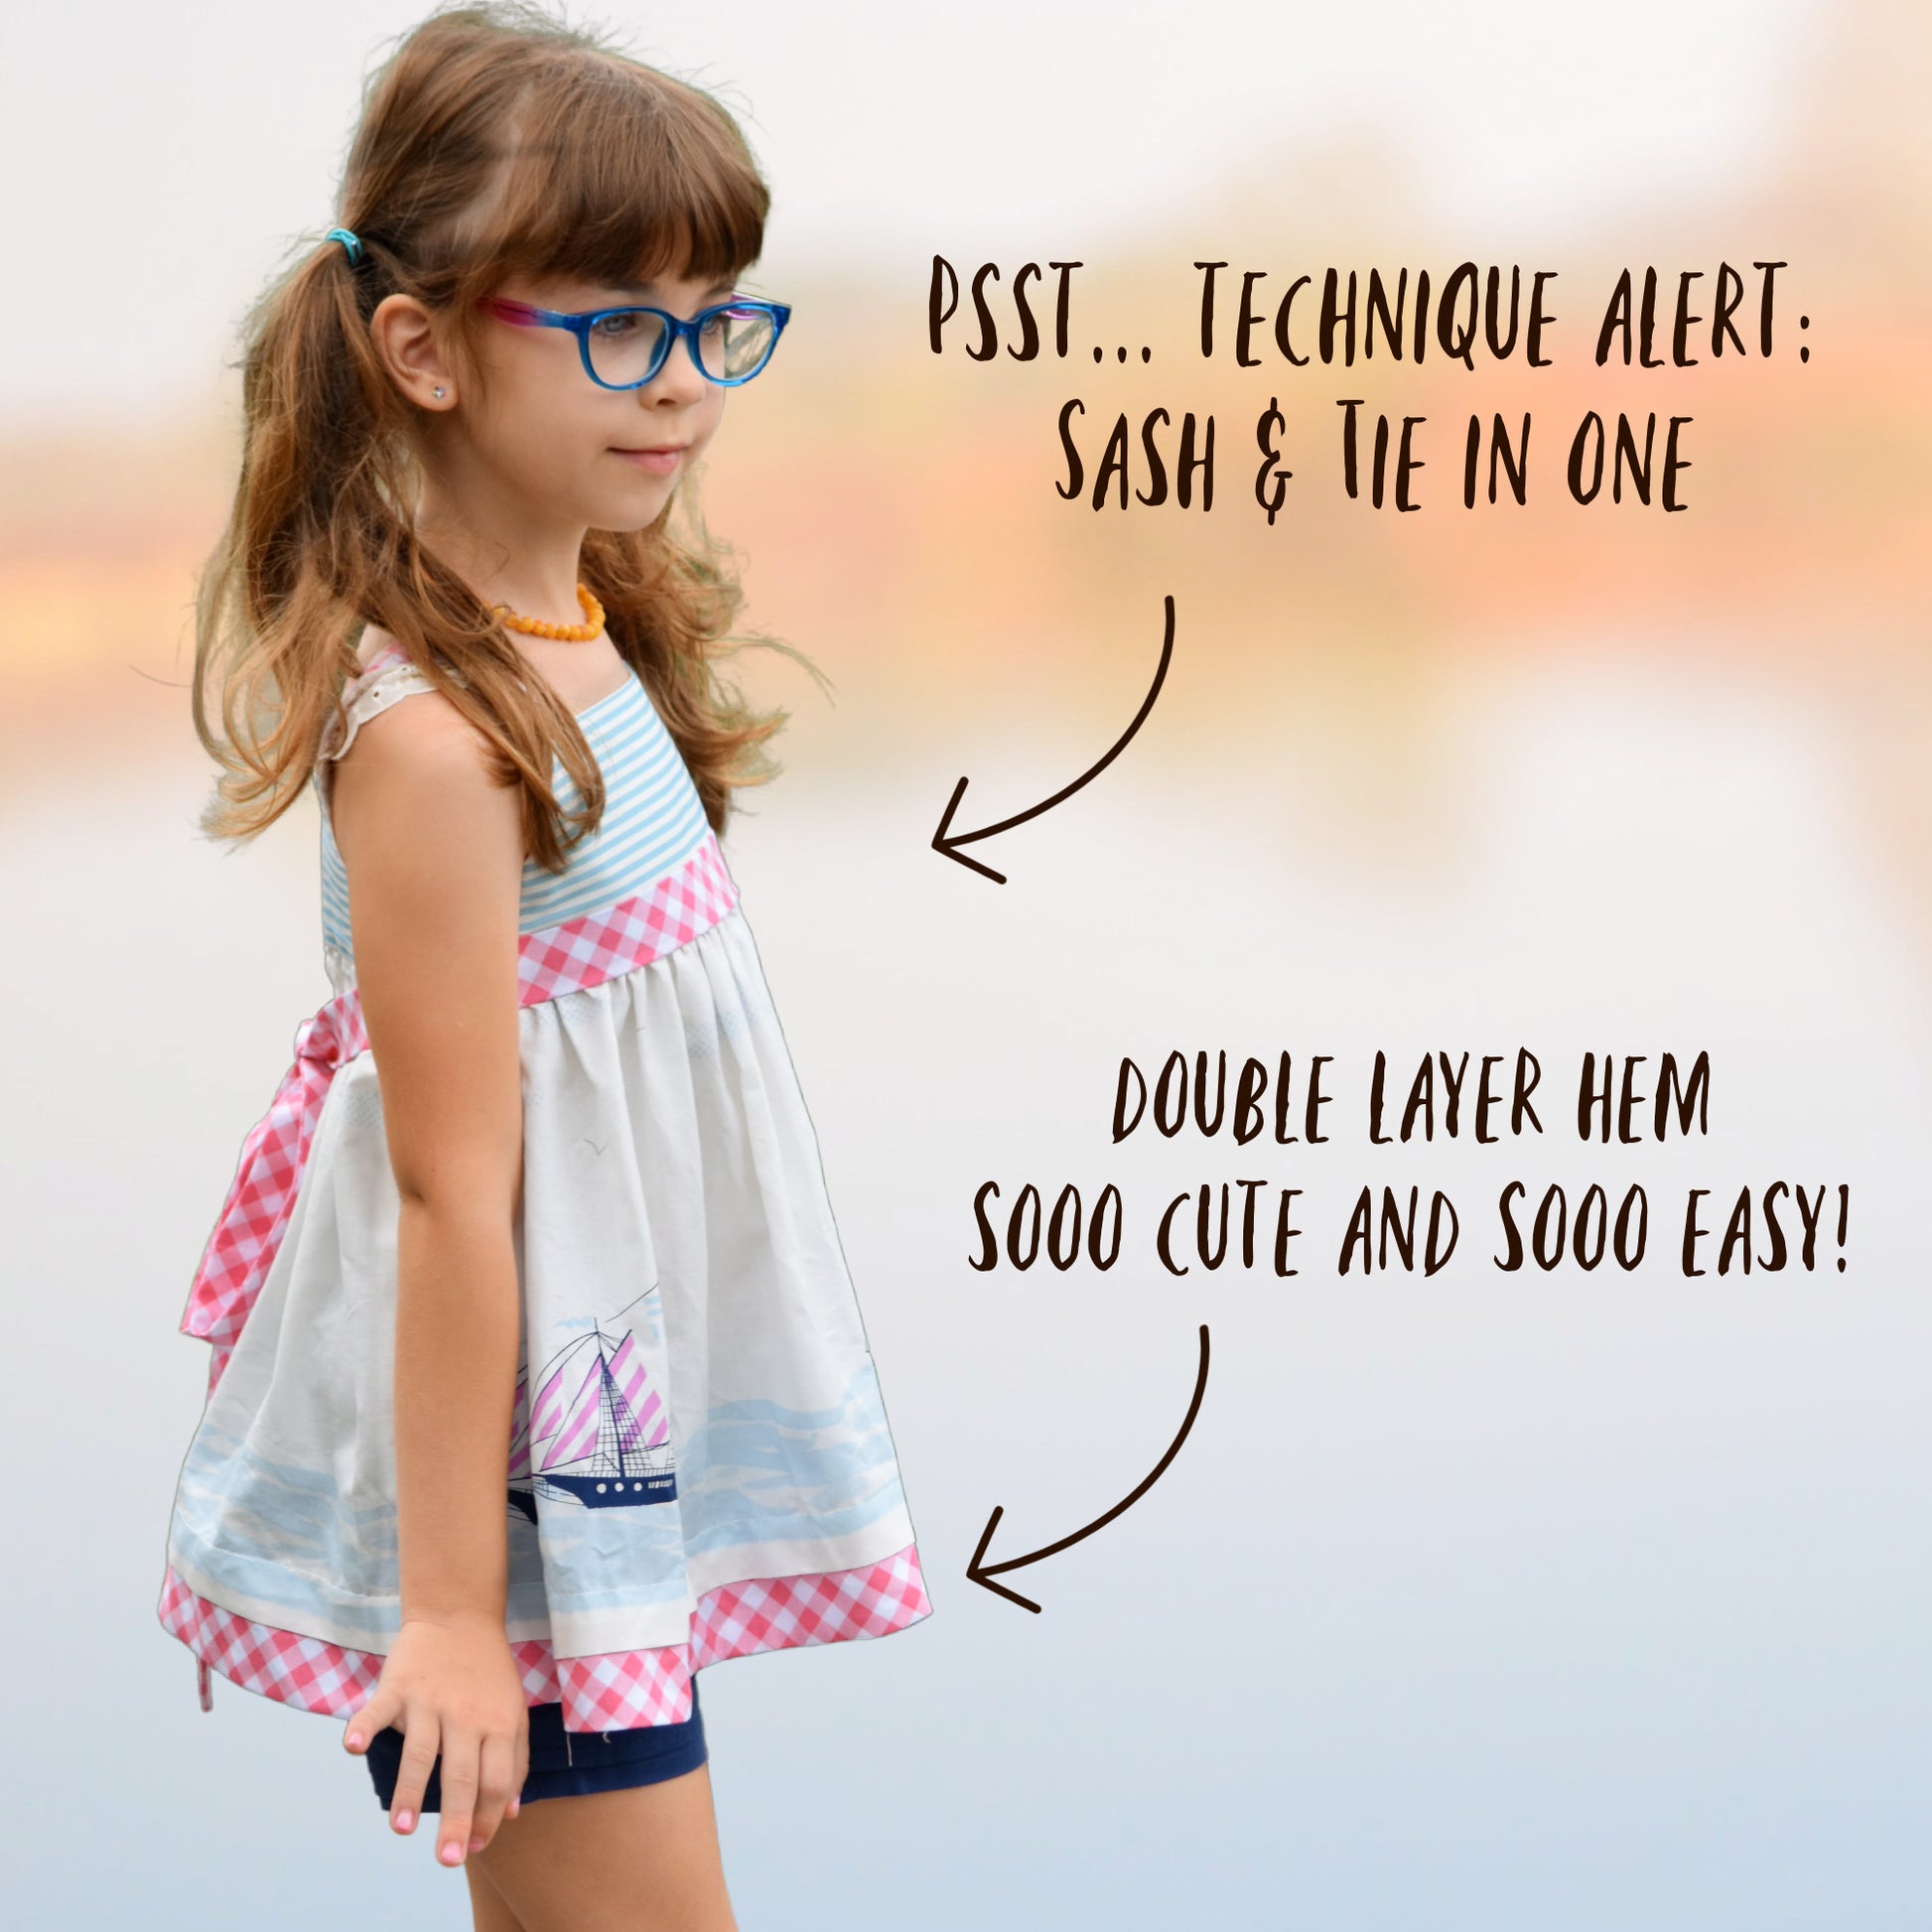
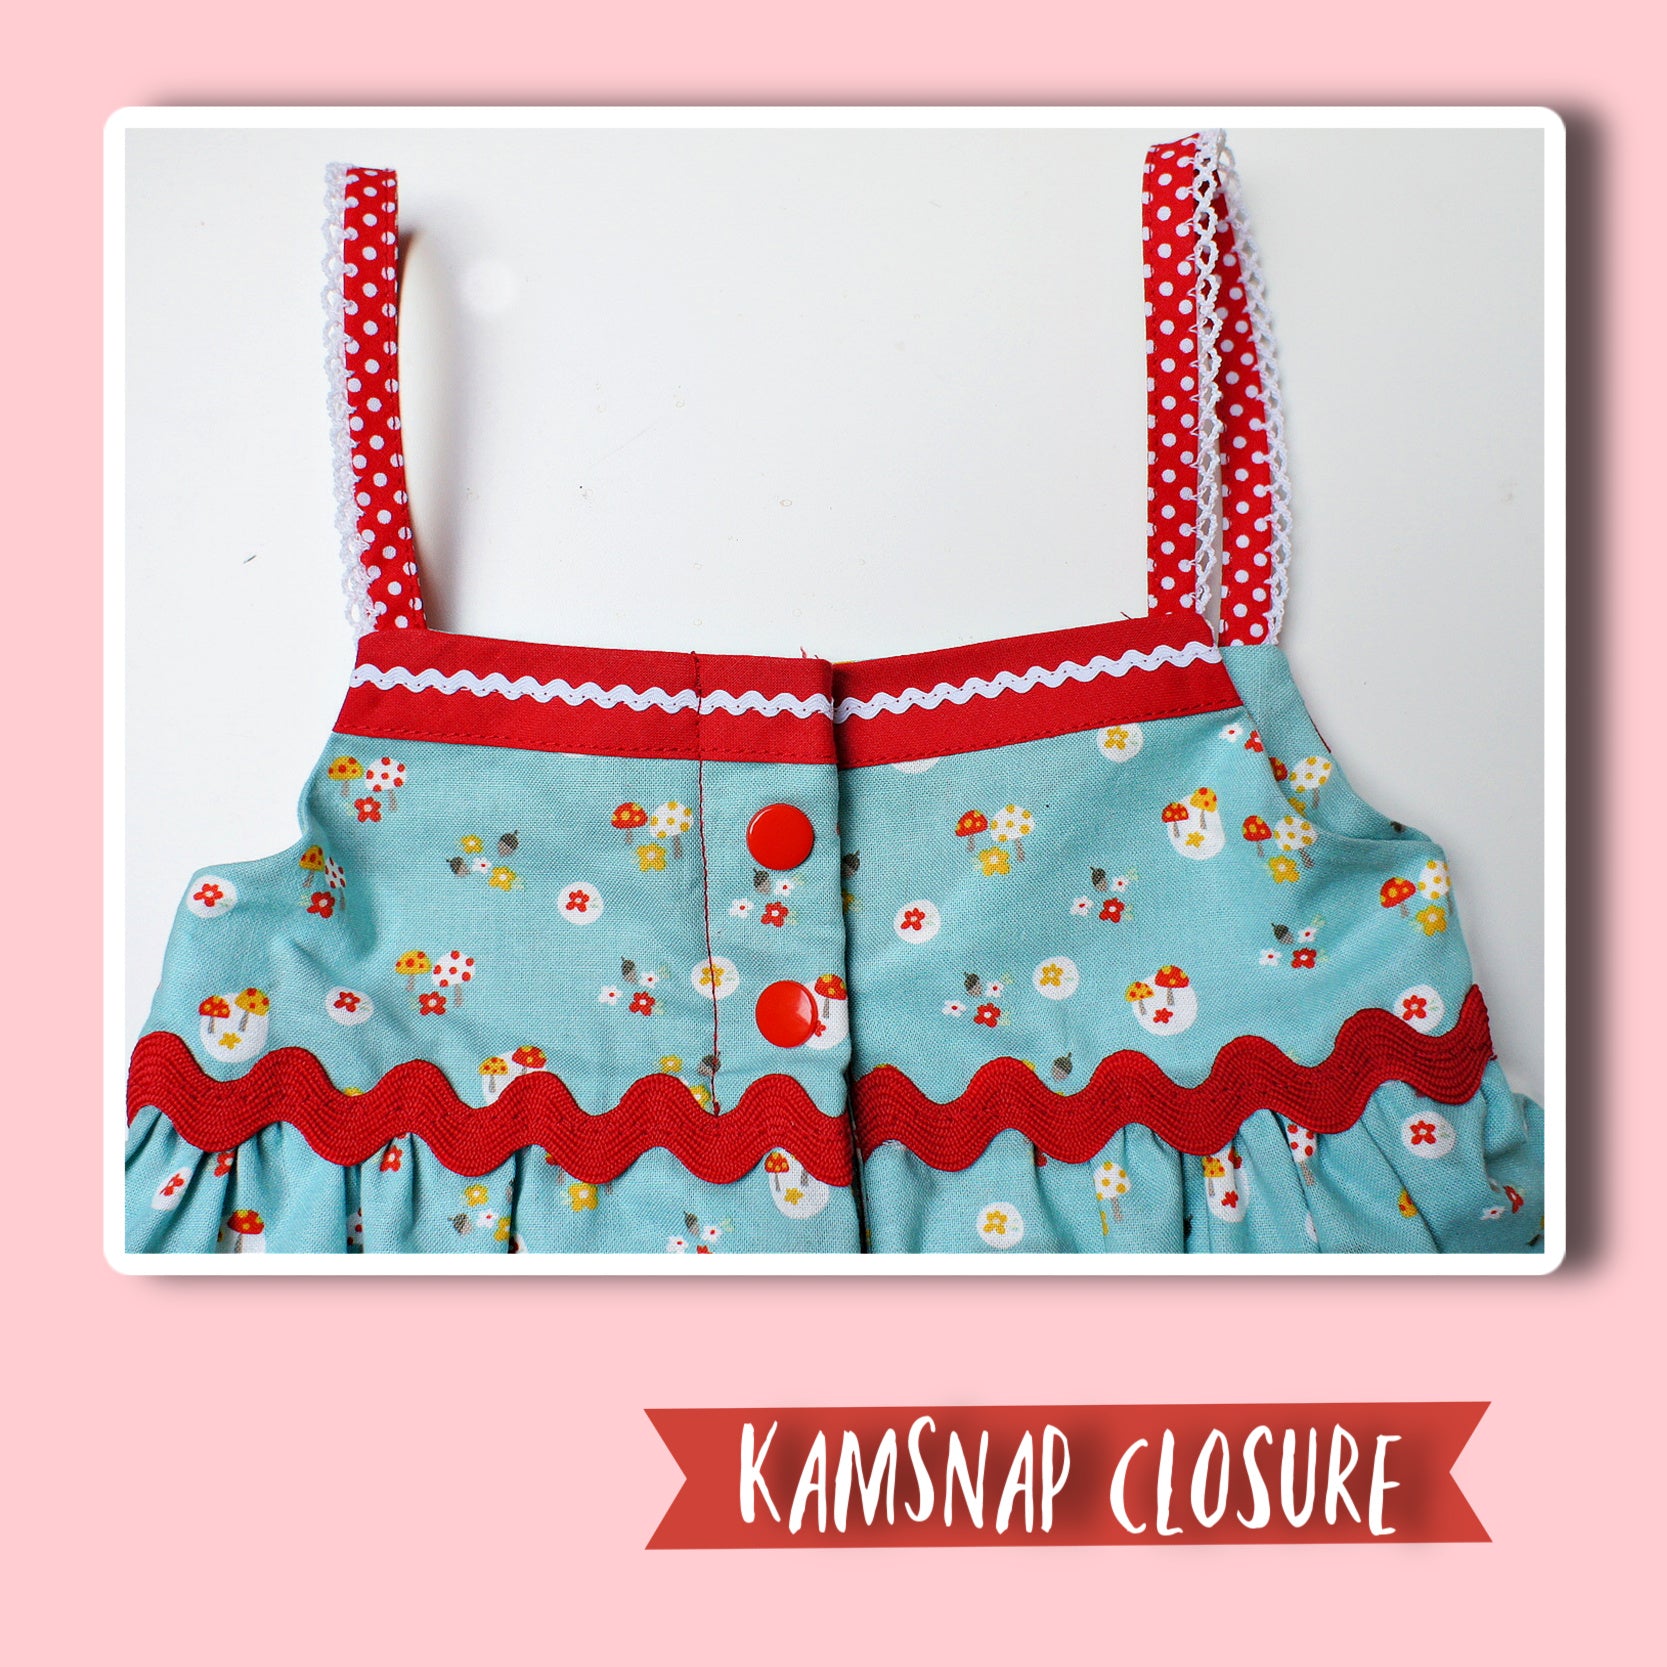
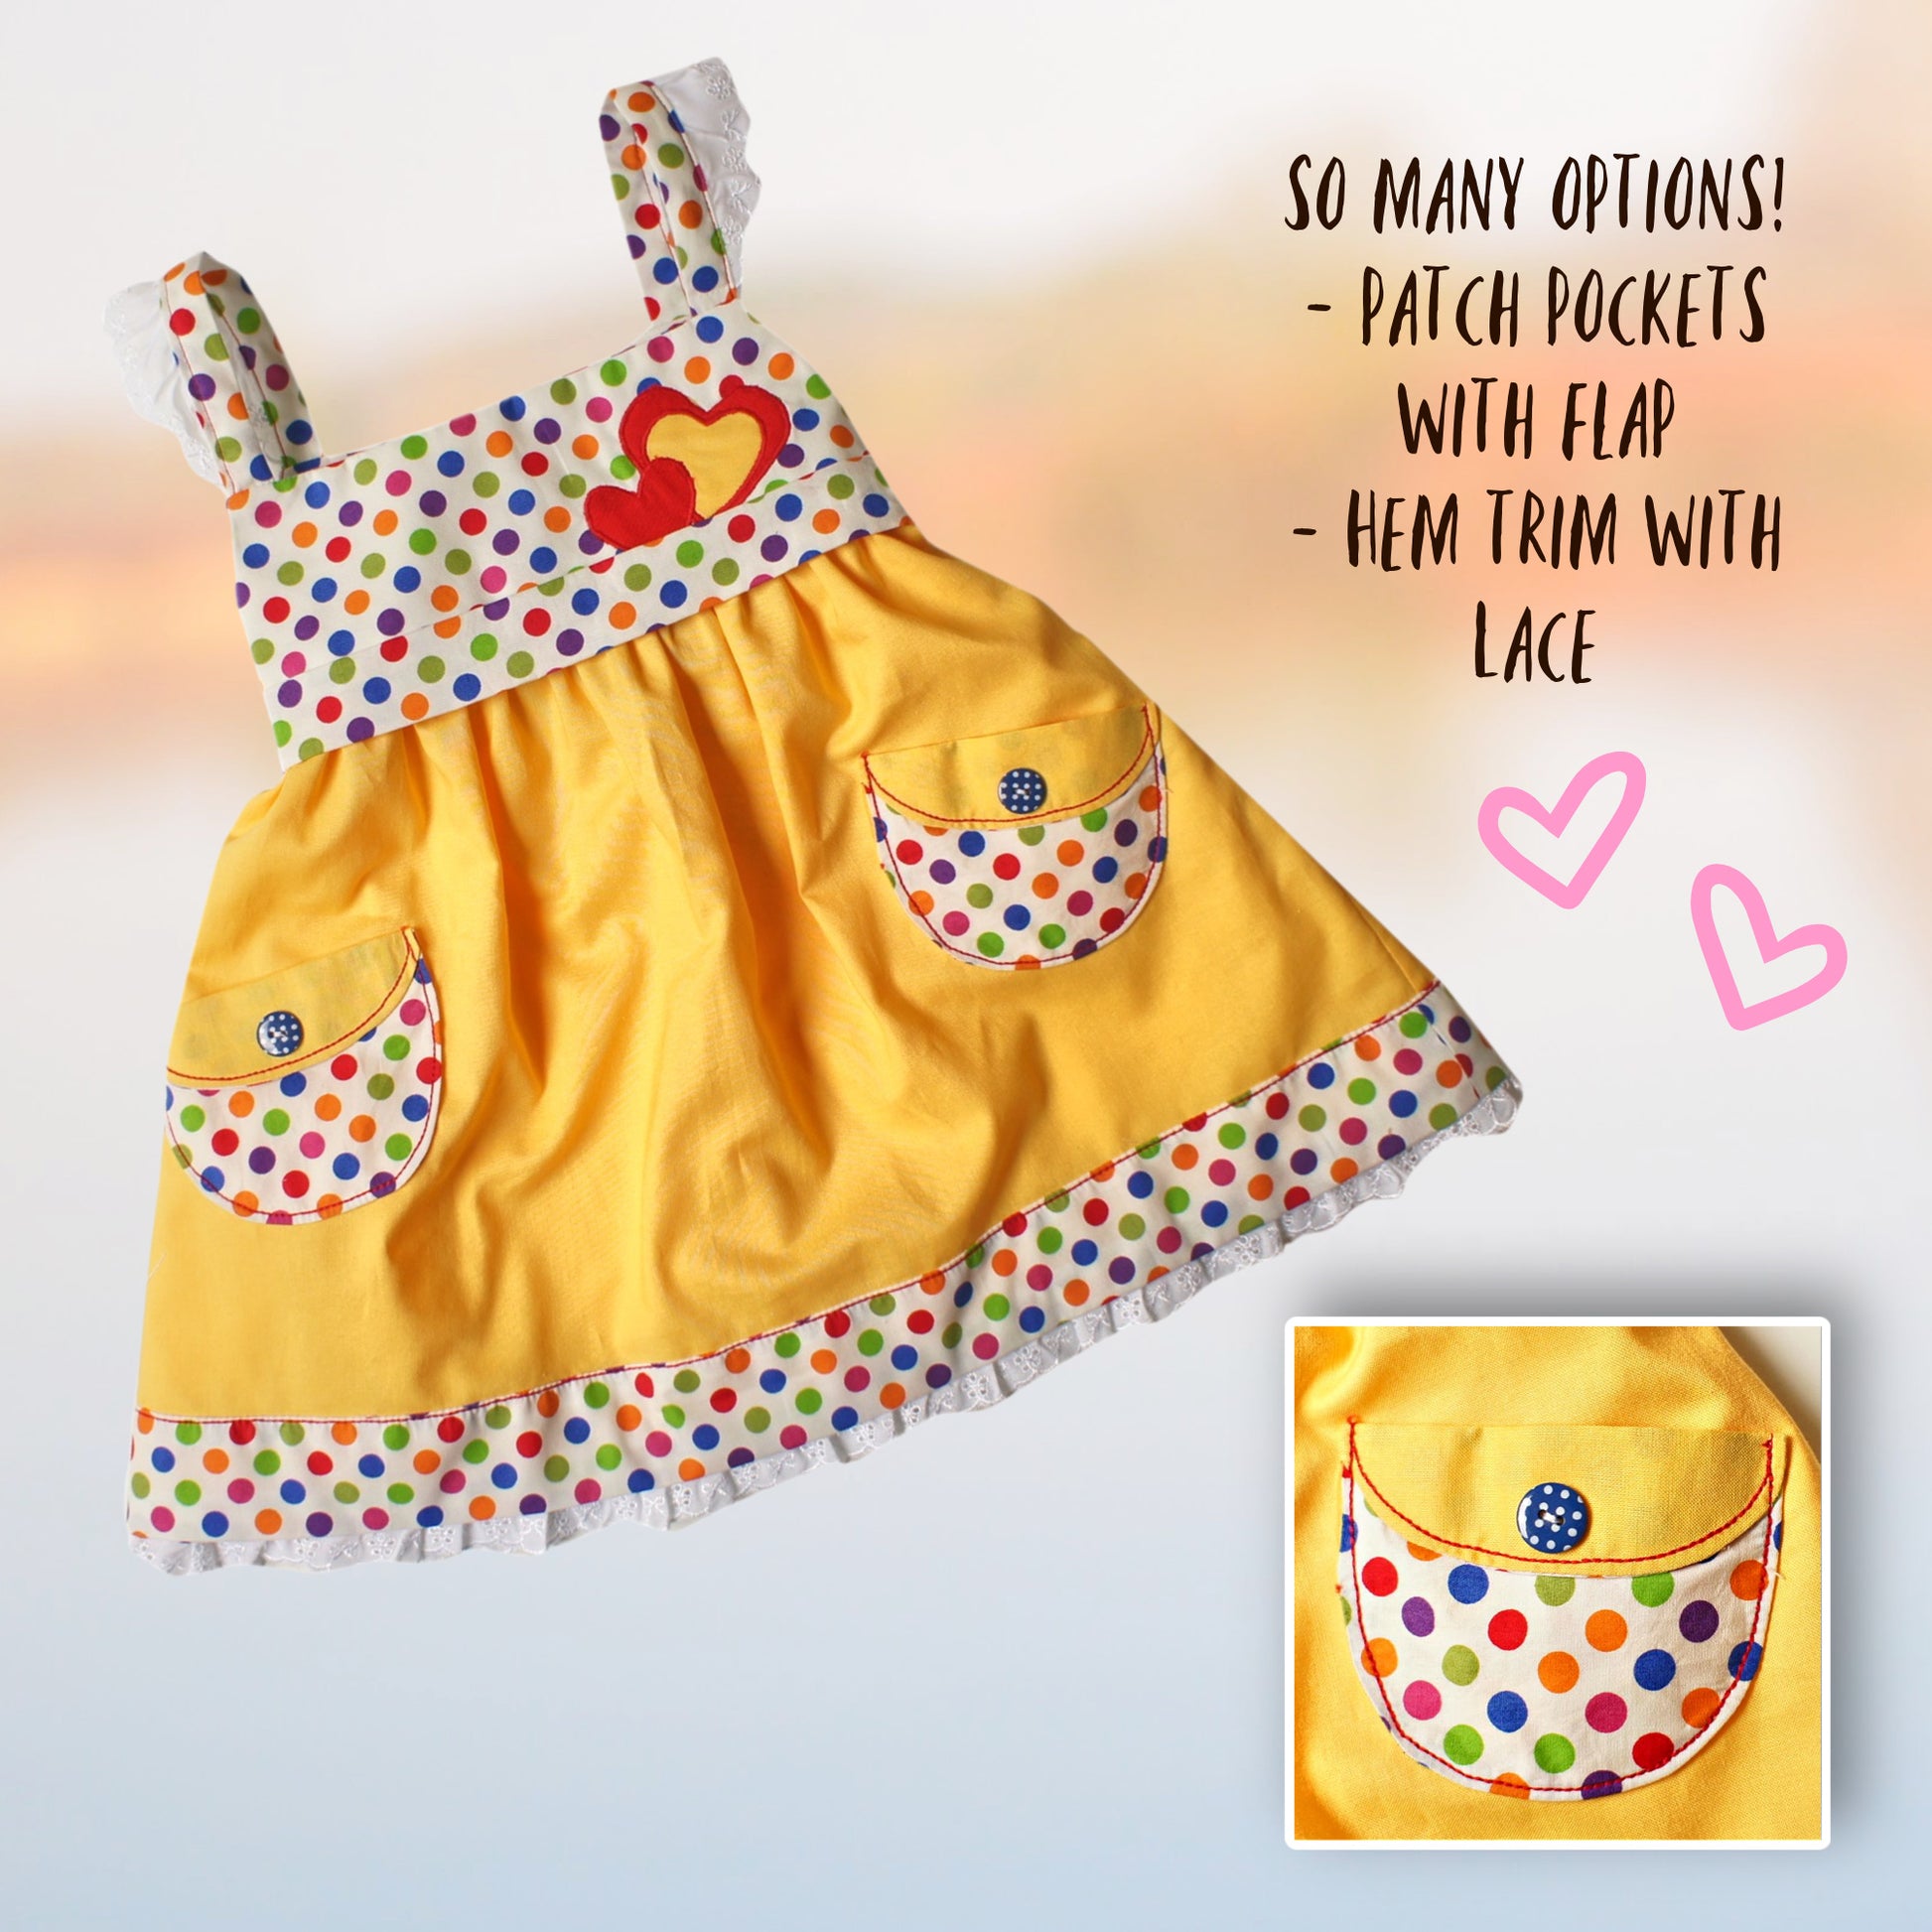
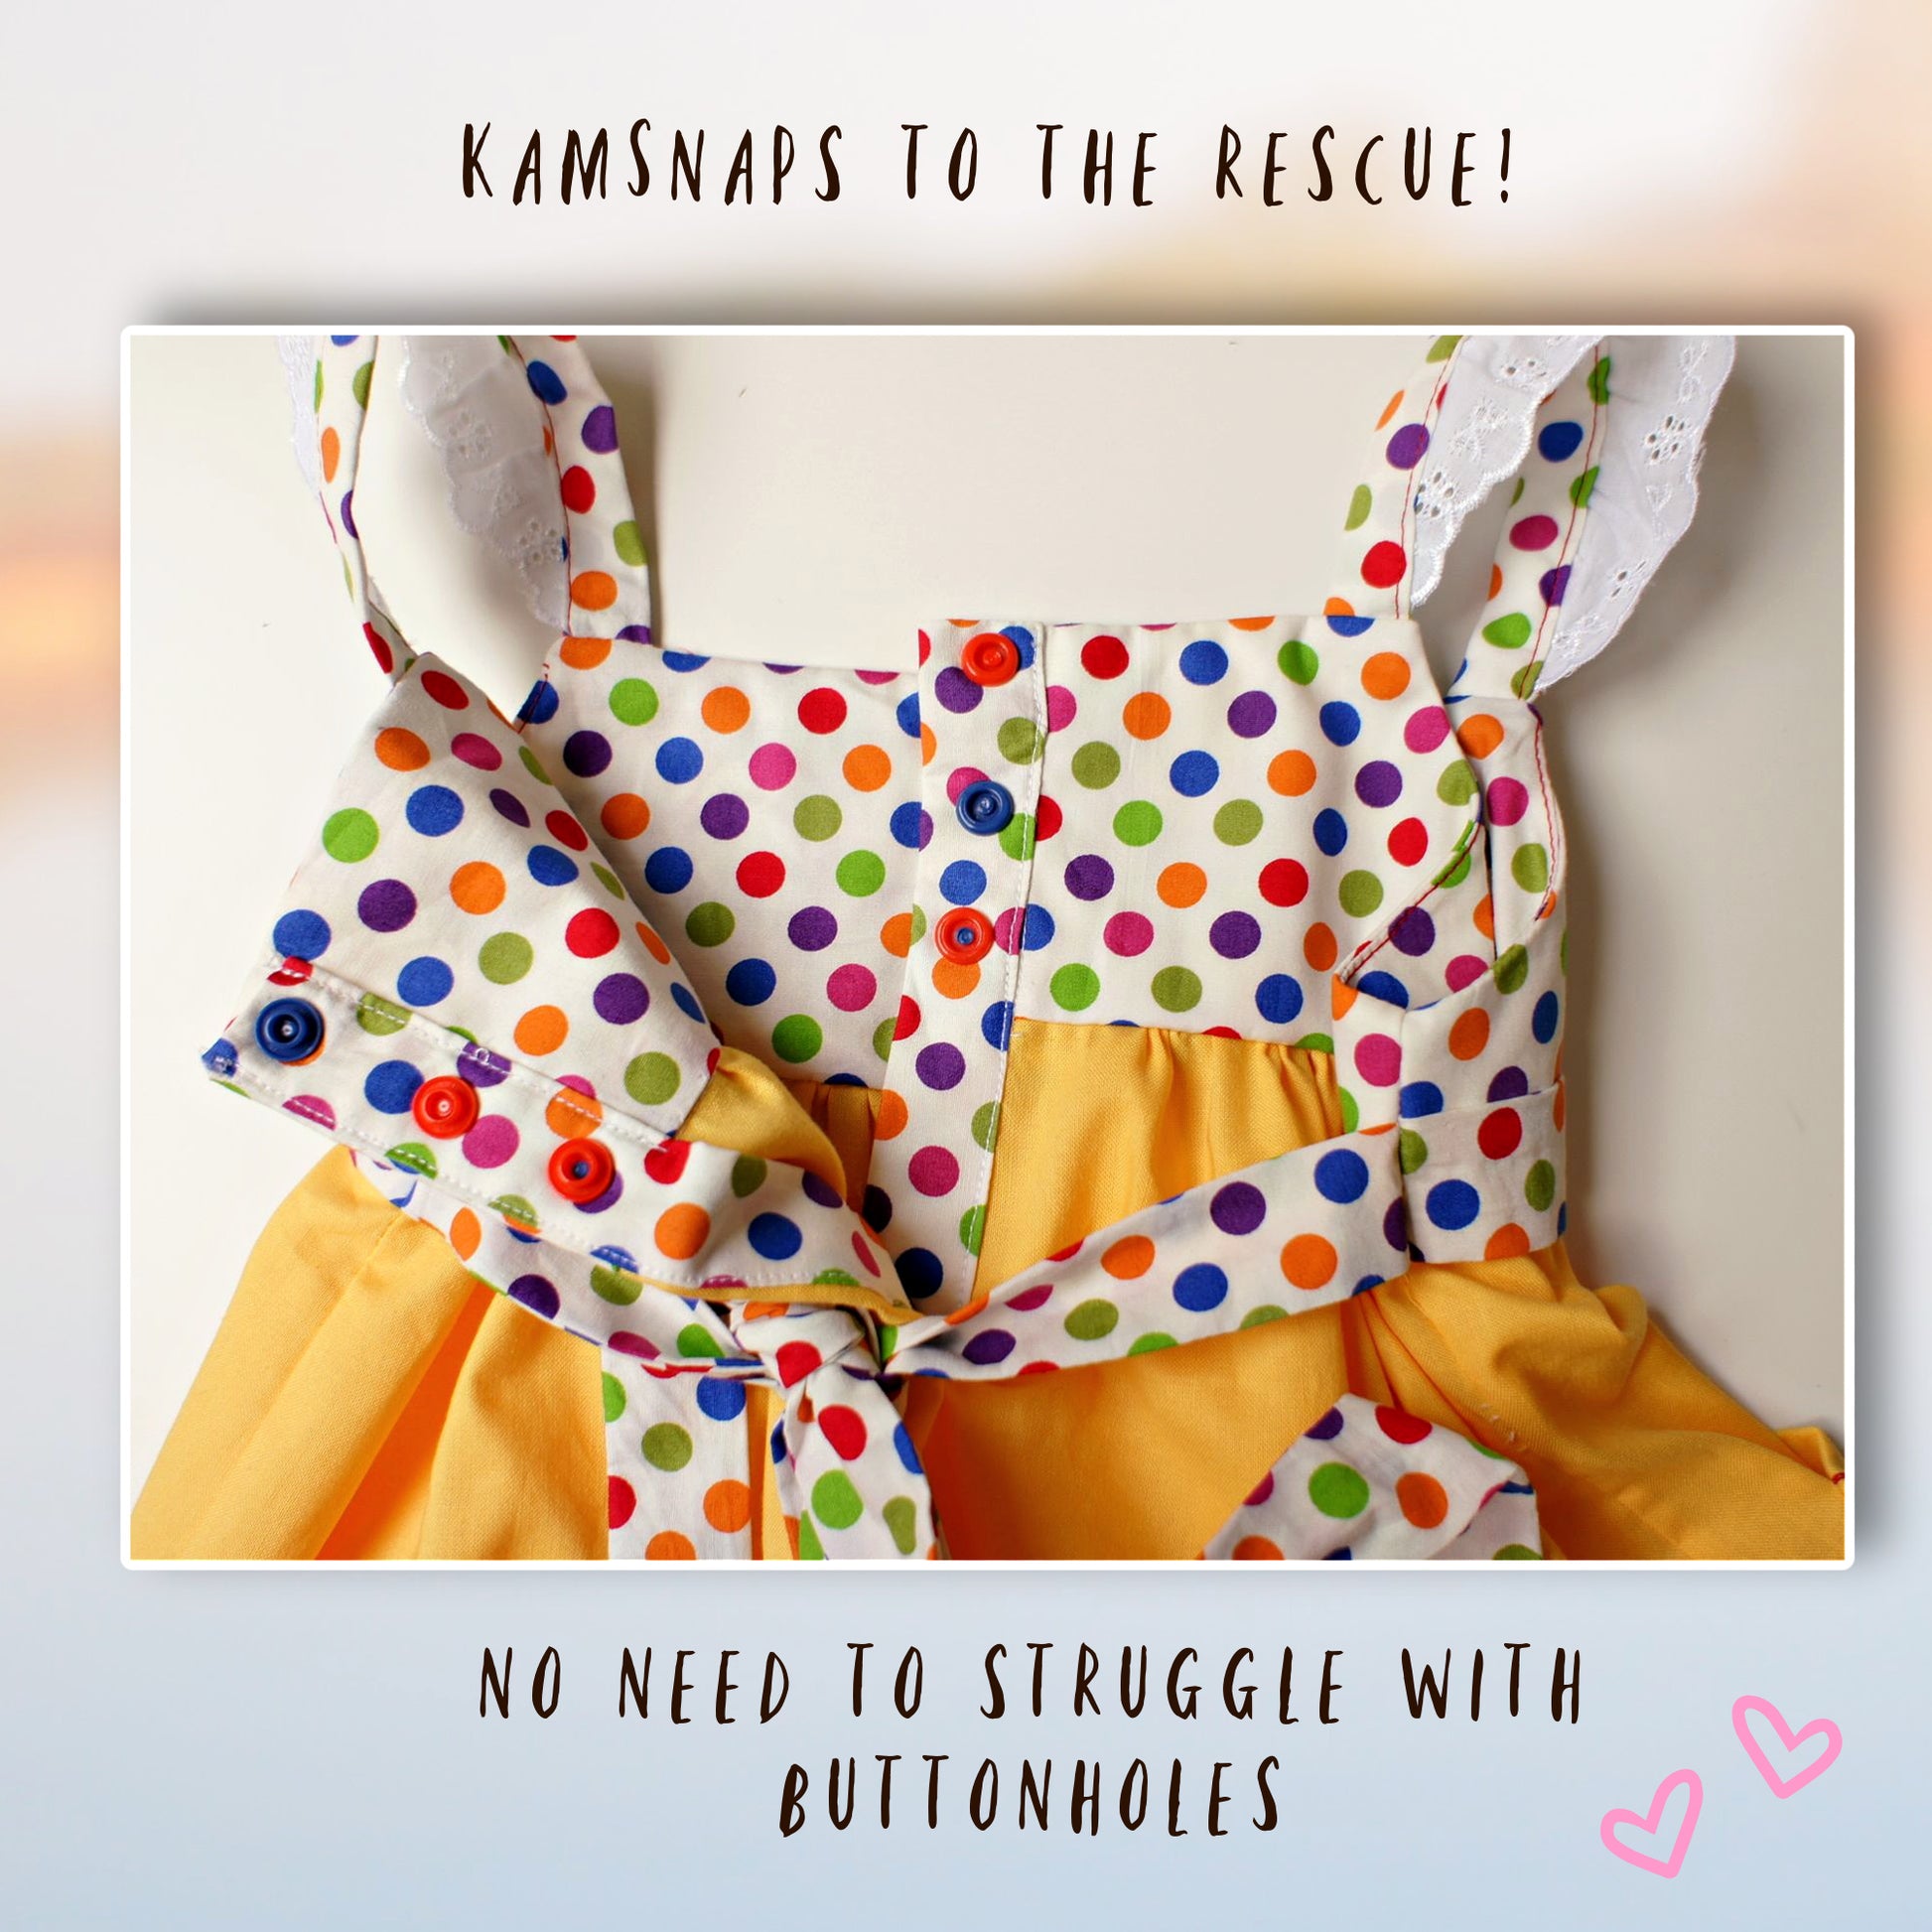
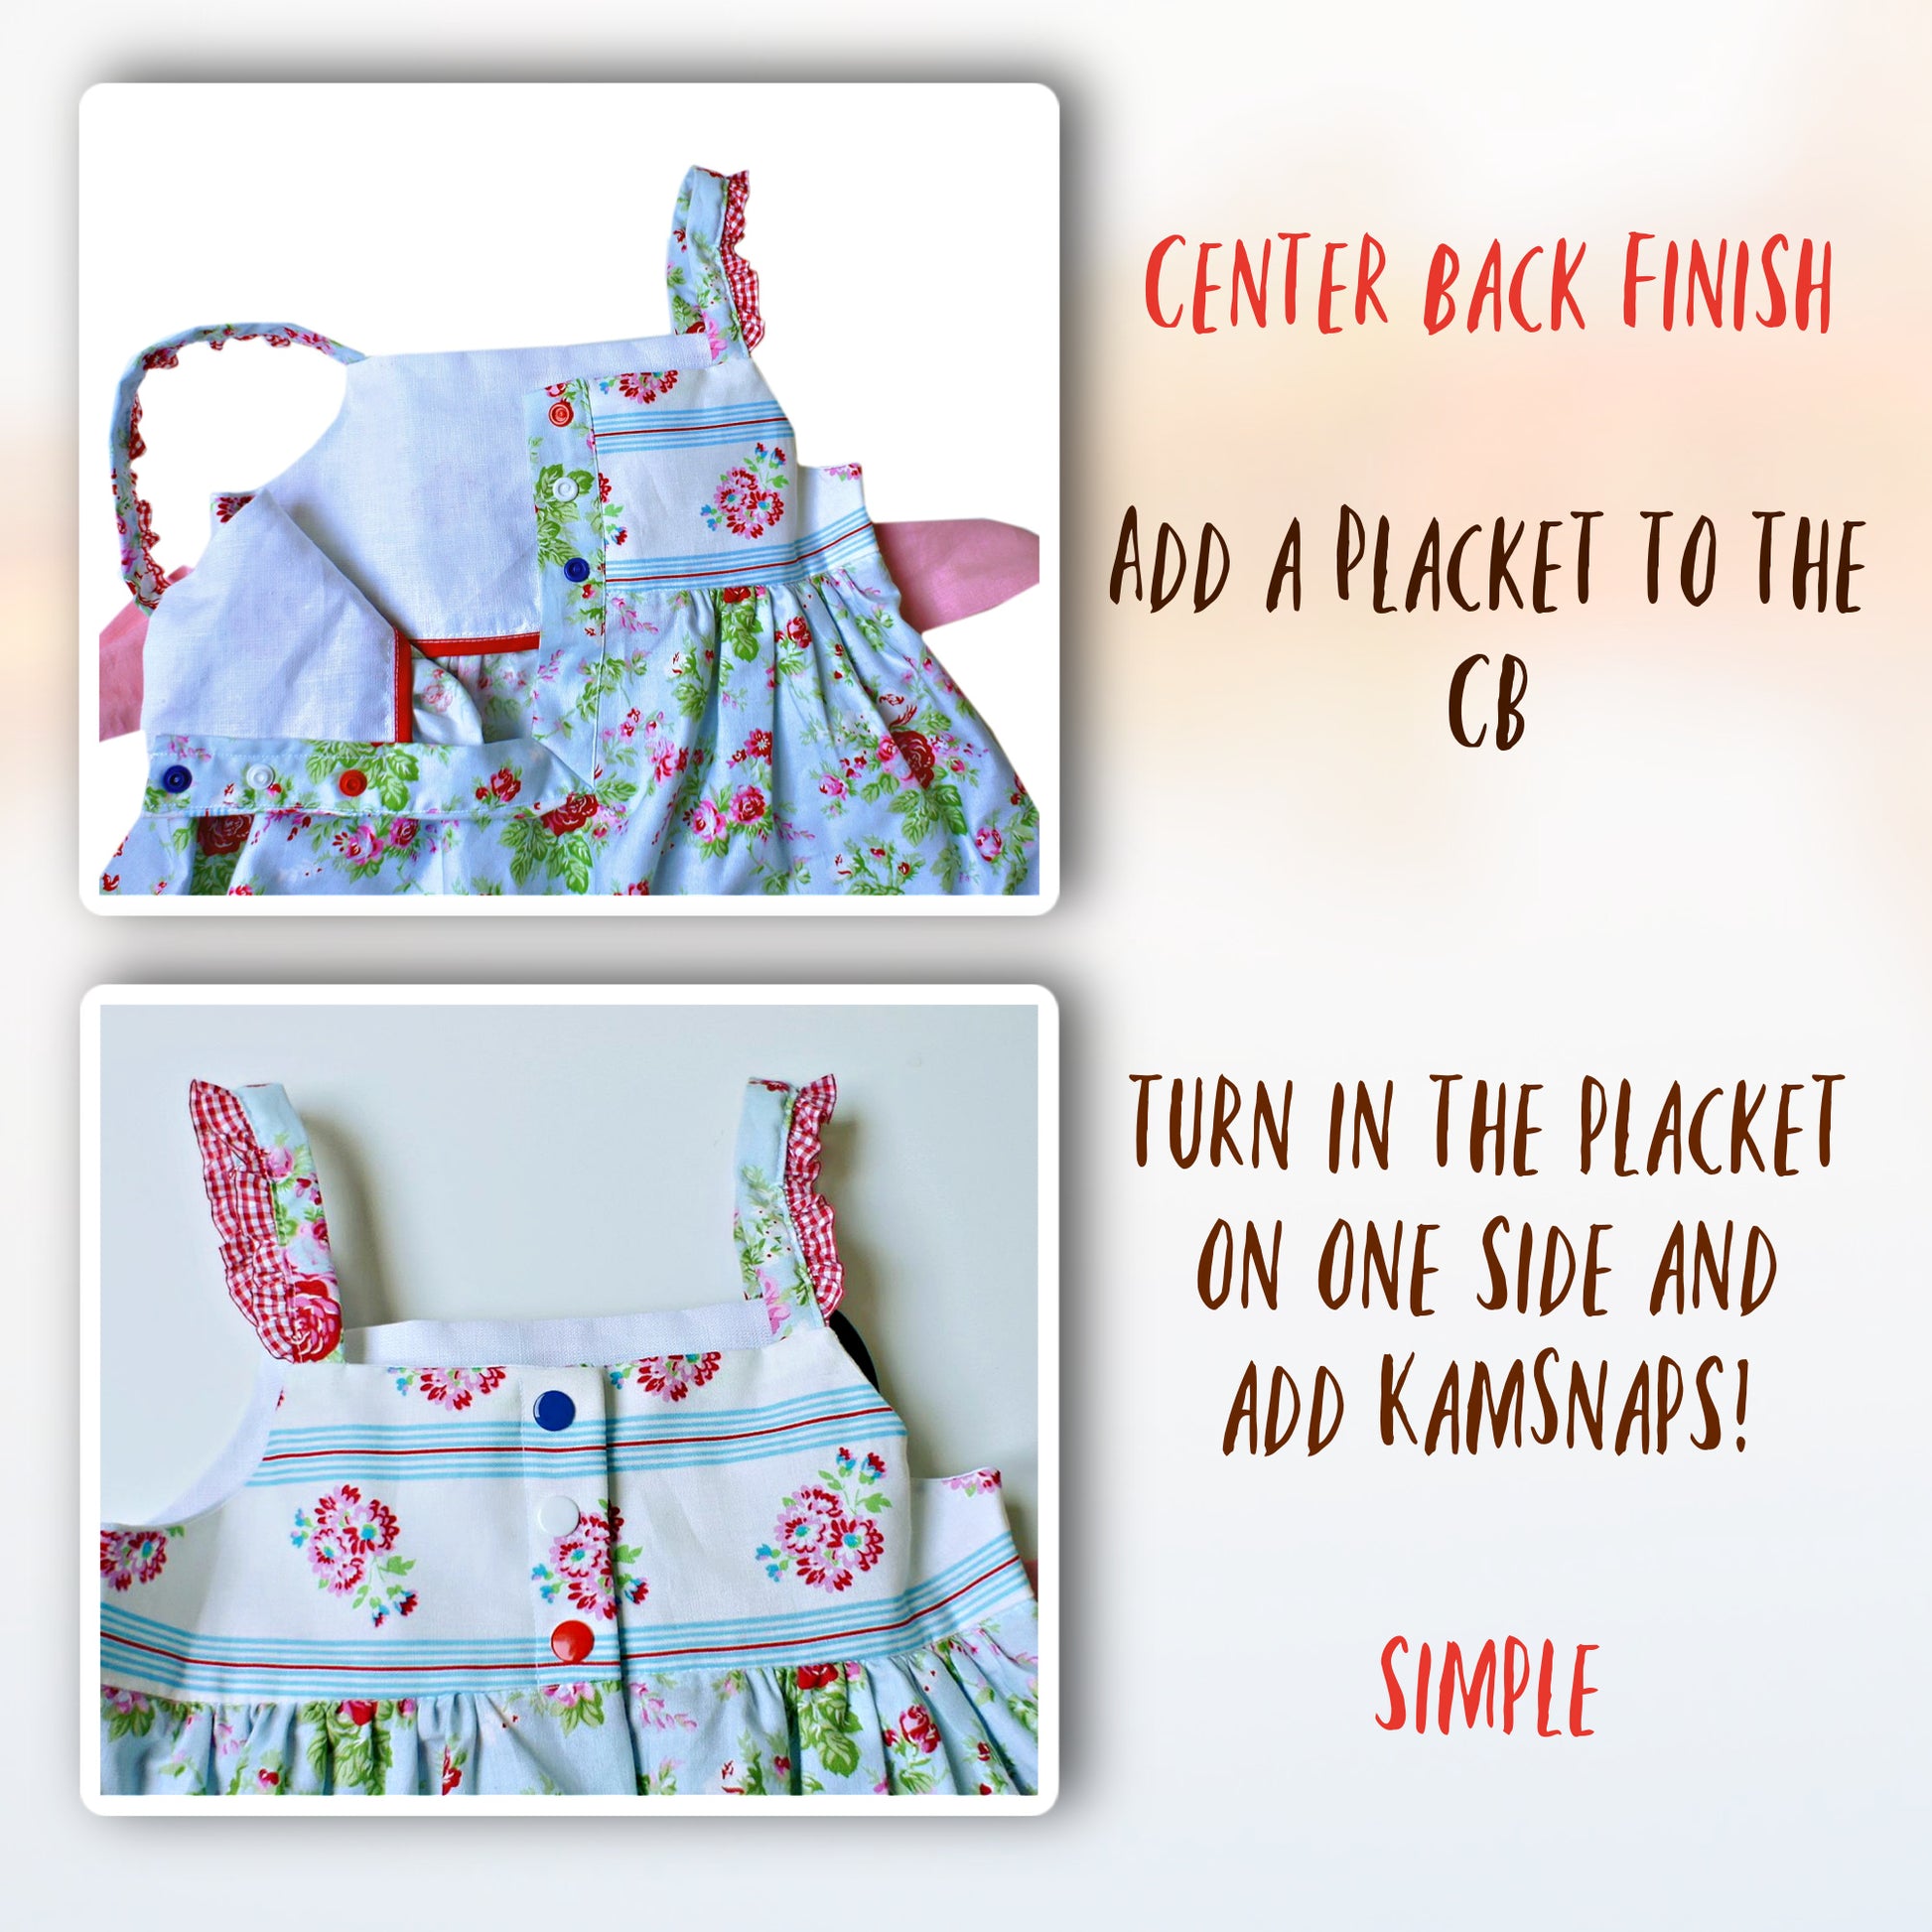
The Natalie Dress is a super‑sweet summer style with a soft empire‑line bodice and a full gathered skirt that’s perfect for twirling. The straps are wonderfully simple when using store‑bought bias binding, and the video also shows you how to cut and sew your own. The back features an easy placket closure with an optional KamSnaps, making dressing quick and fuss‑free.
And for extra support, you’ll find a full video tutorial waiting below — scroll down and follow along with Marina, and you’ll see just how easy and enjoyable this pattern is to sew.
Pattern Download Includes
Pattern Download Includes
Design Options
Design Options
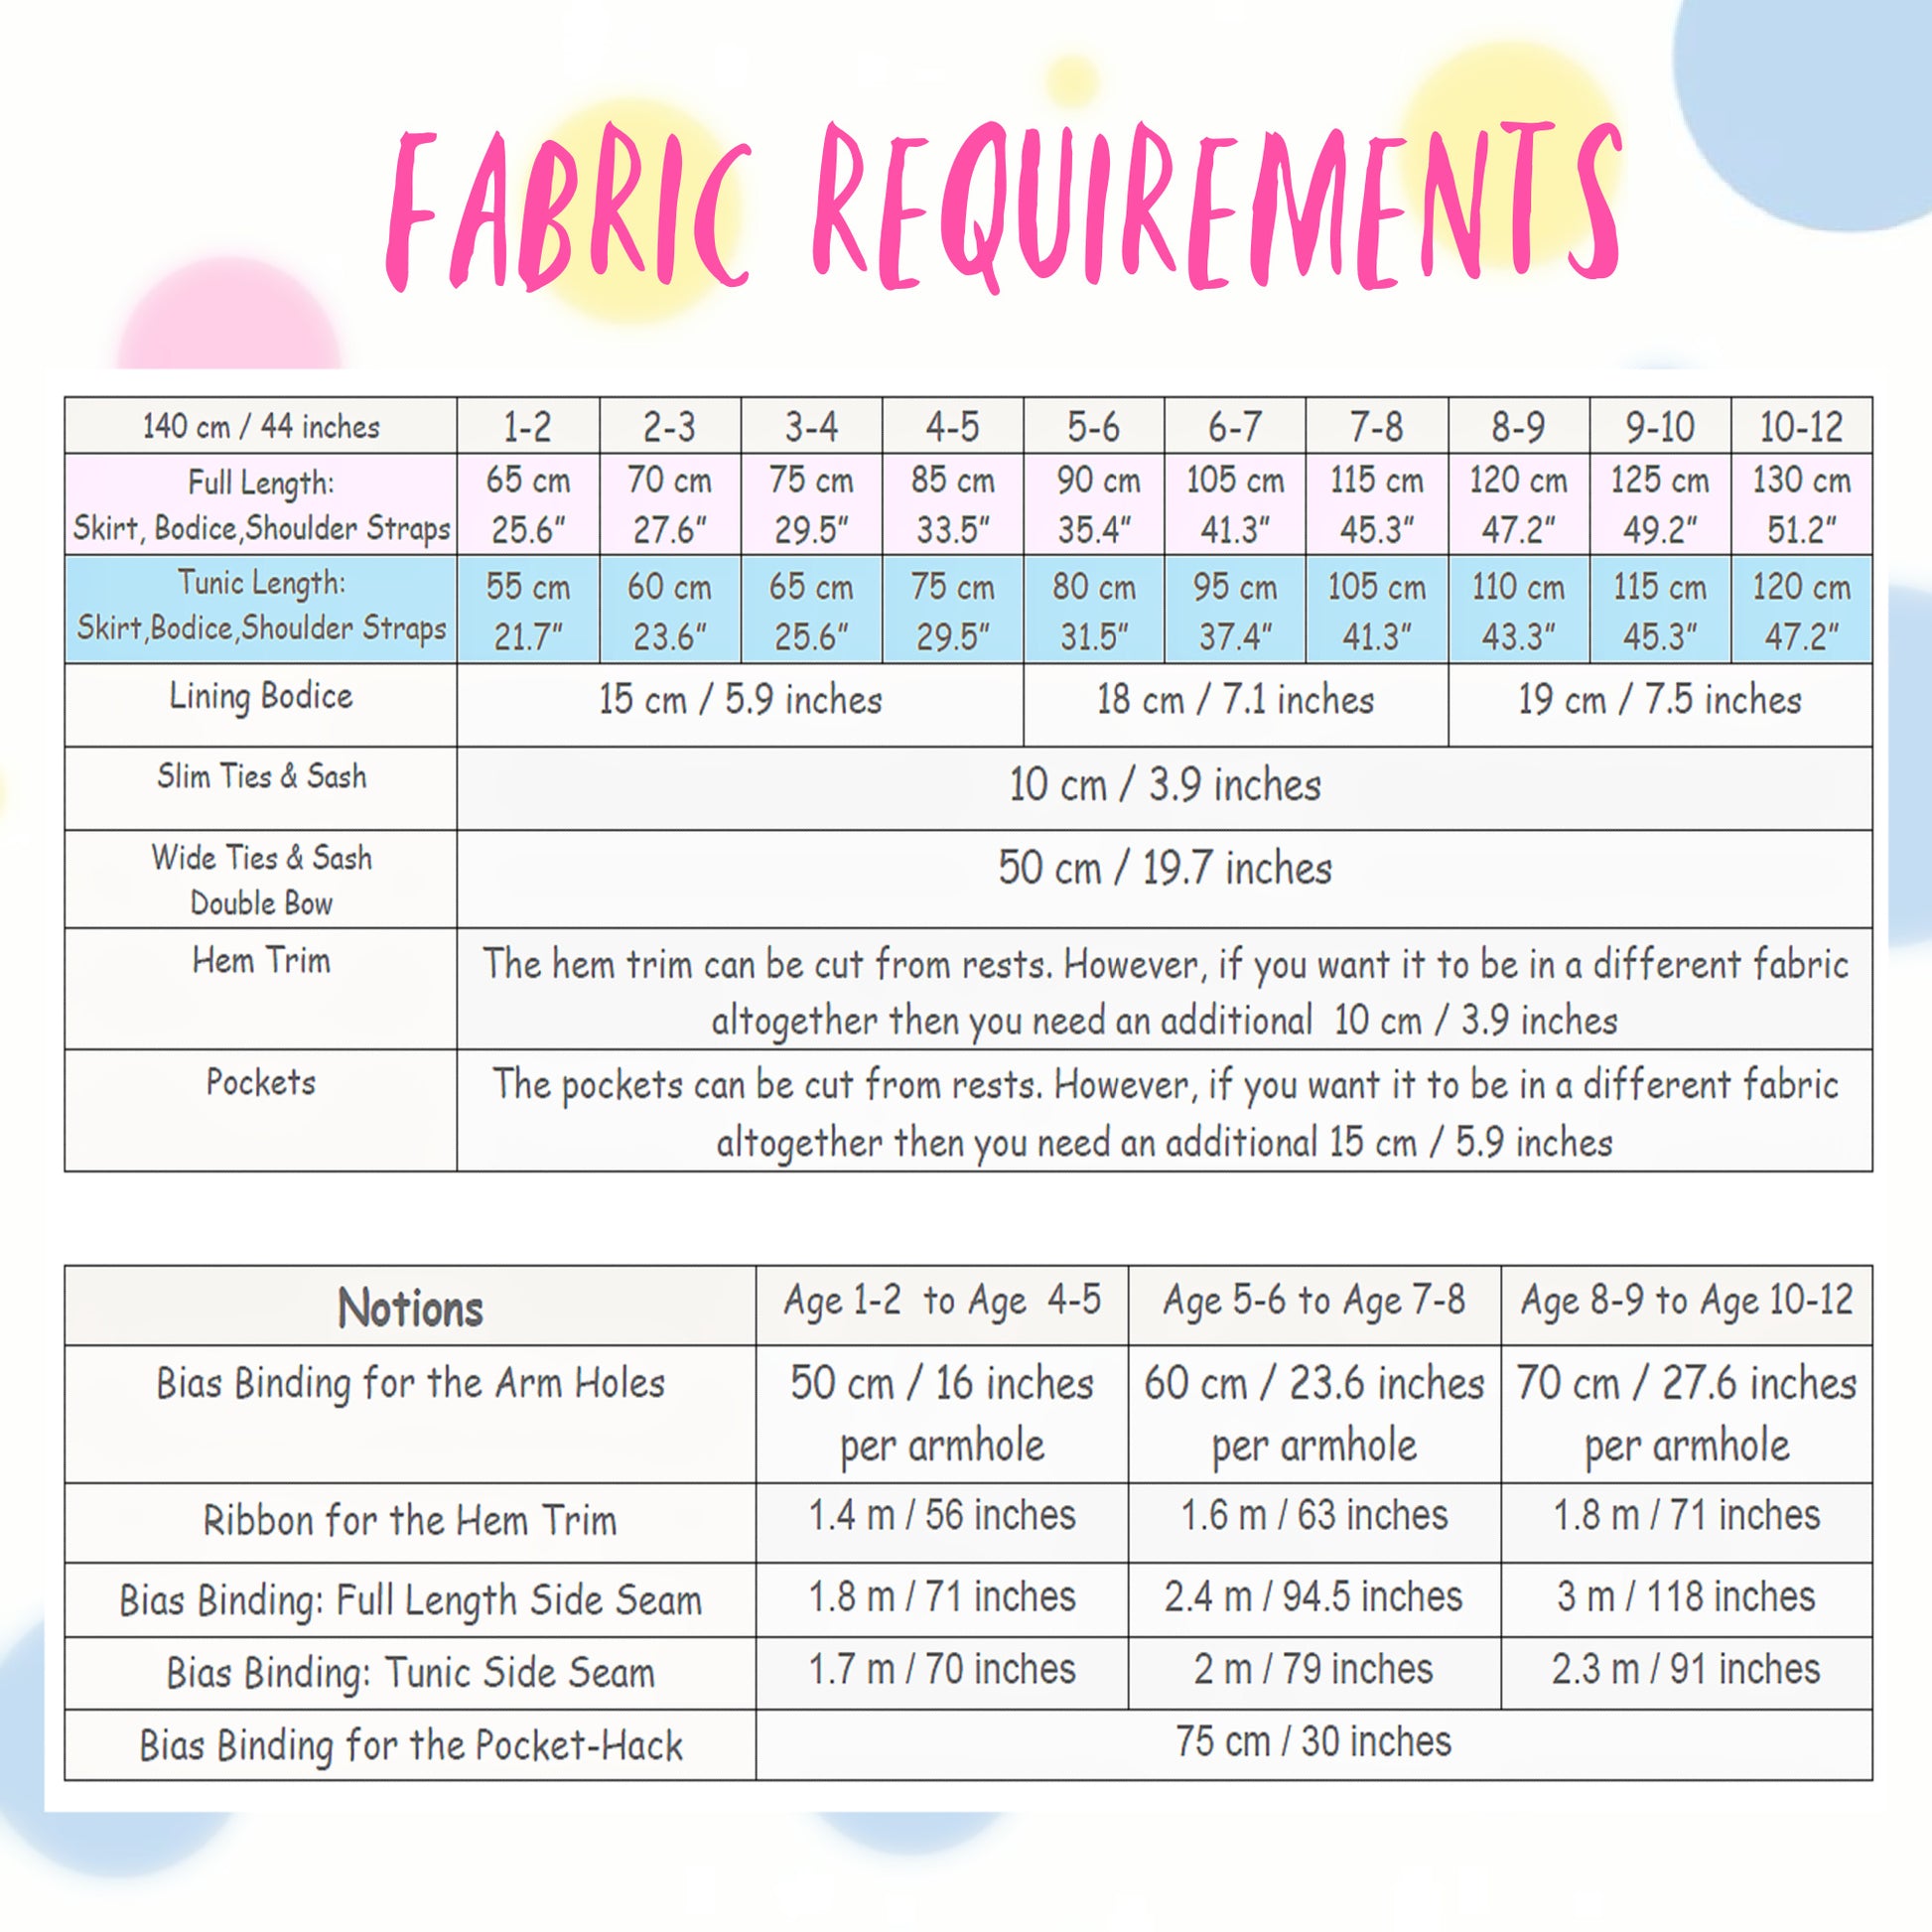
Fabric Requirements
Fabric Requirements
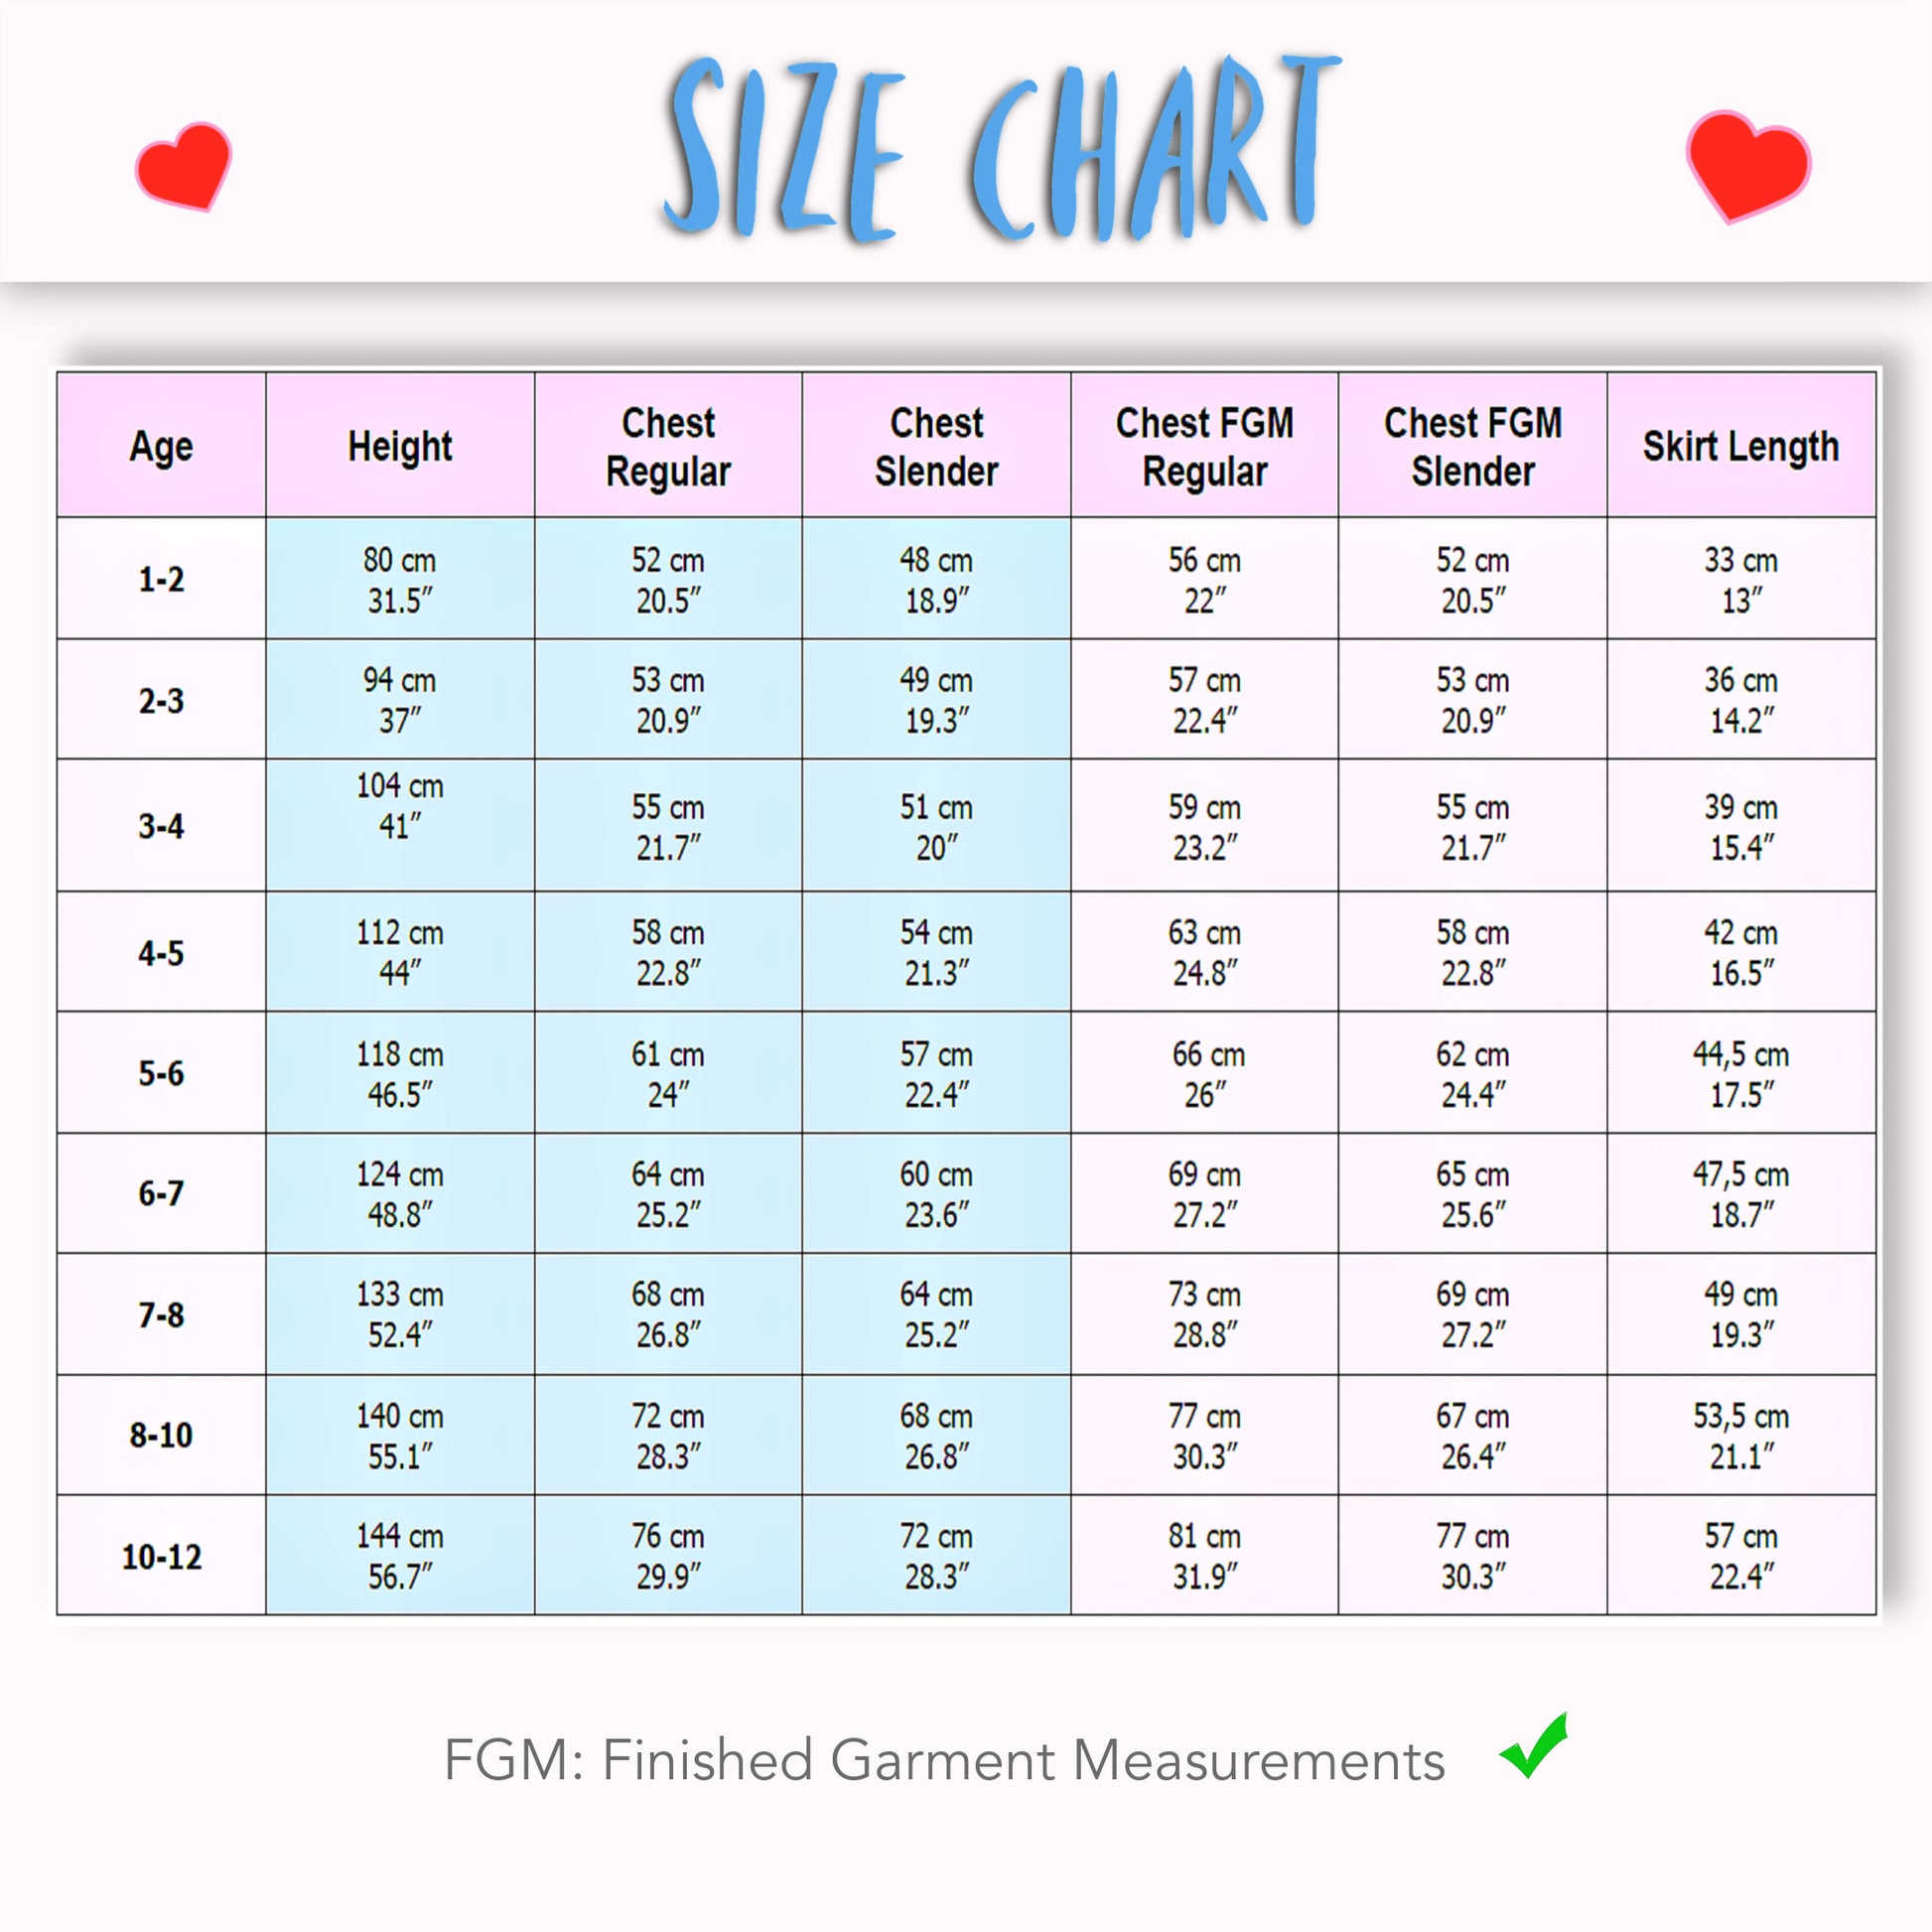
Available Sizes
Available Sizes
Please Read
Please Read


STEP-BY-STEP VIDEO TUTORIALS

NATALIE: INTRODUCTION TO THE PROJECT

NATALIE: STEP-BY-STEP TUTORIAL

BIAS BINDING THE ARMHOLE

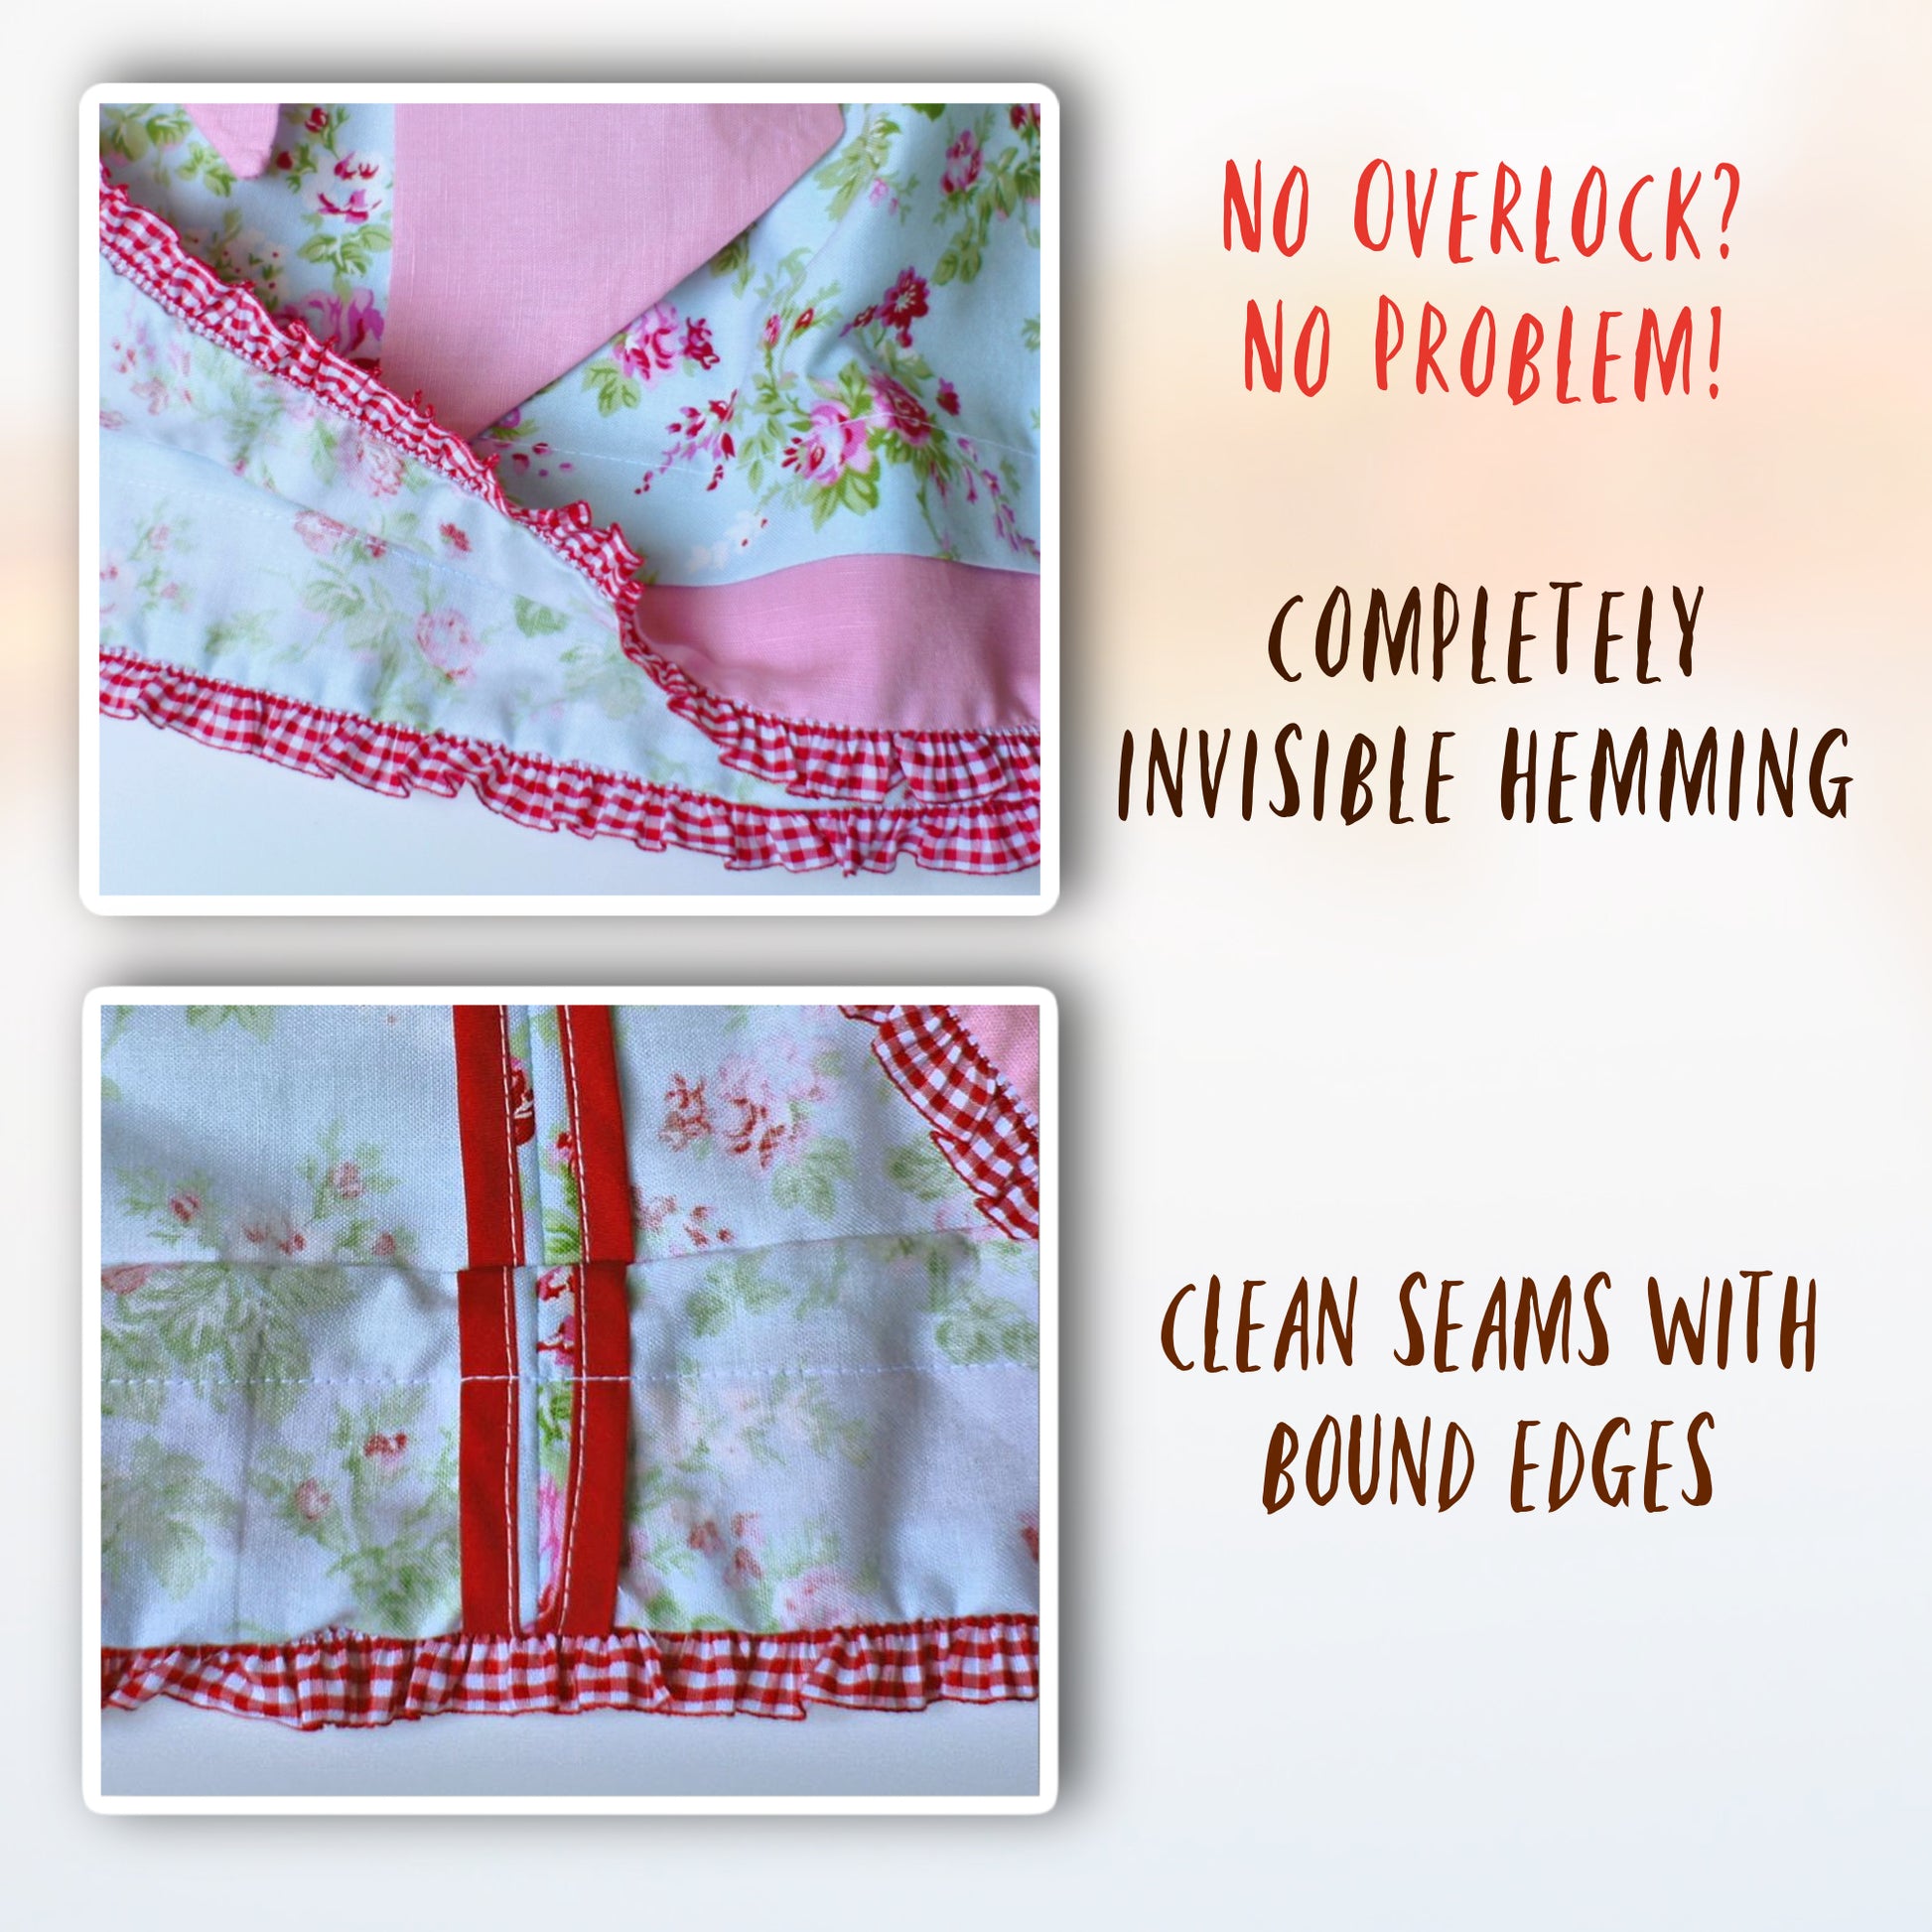
NO SERGER NECESSARY & THE CUTEST POCKETS

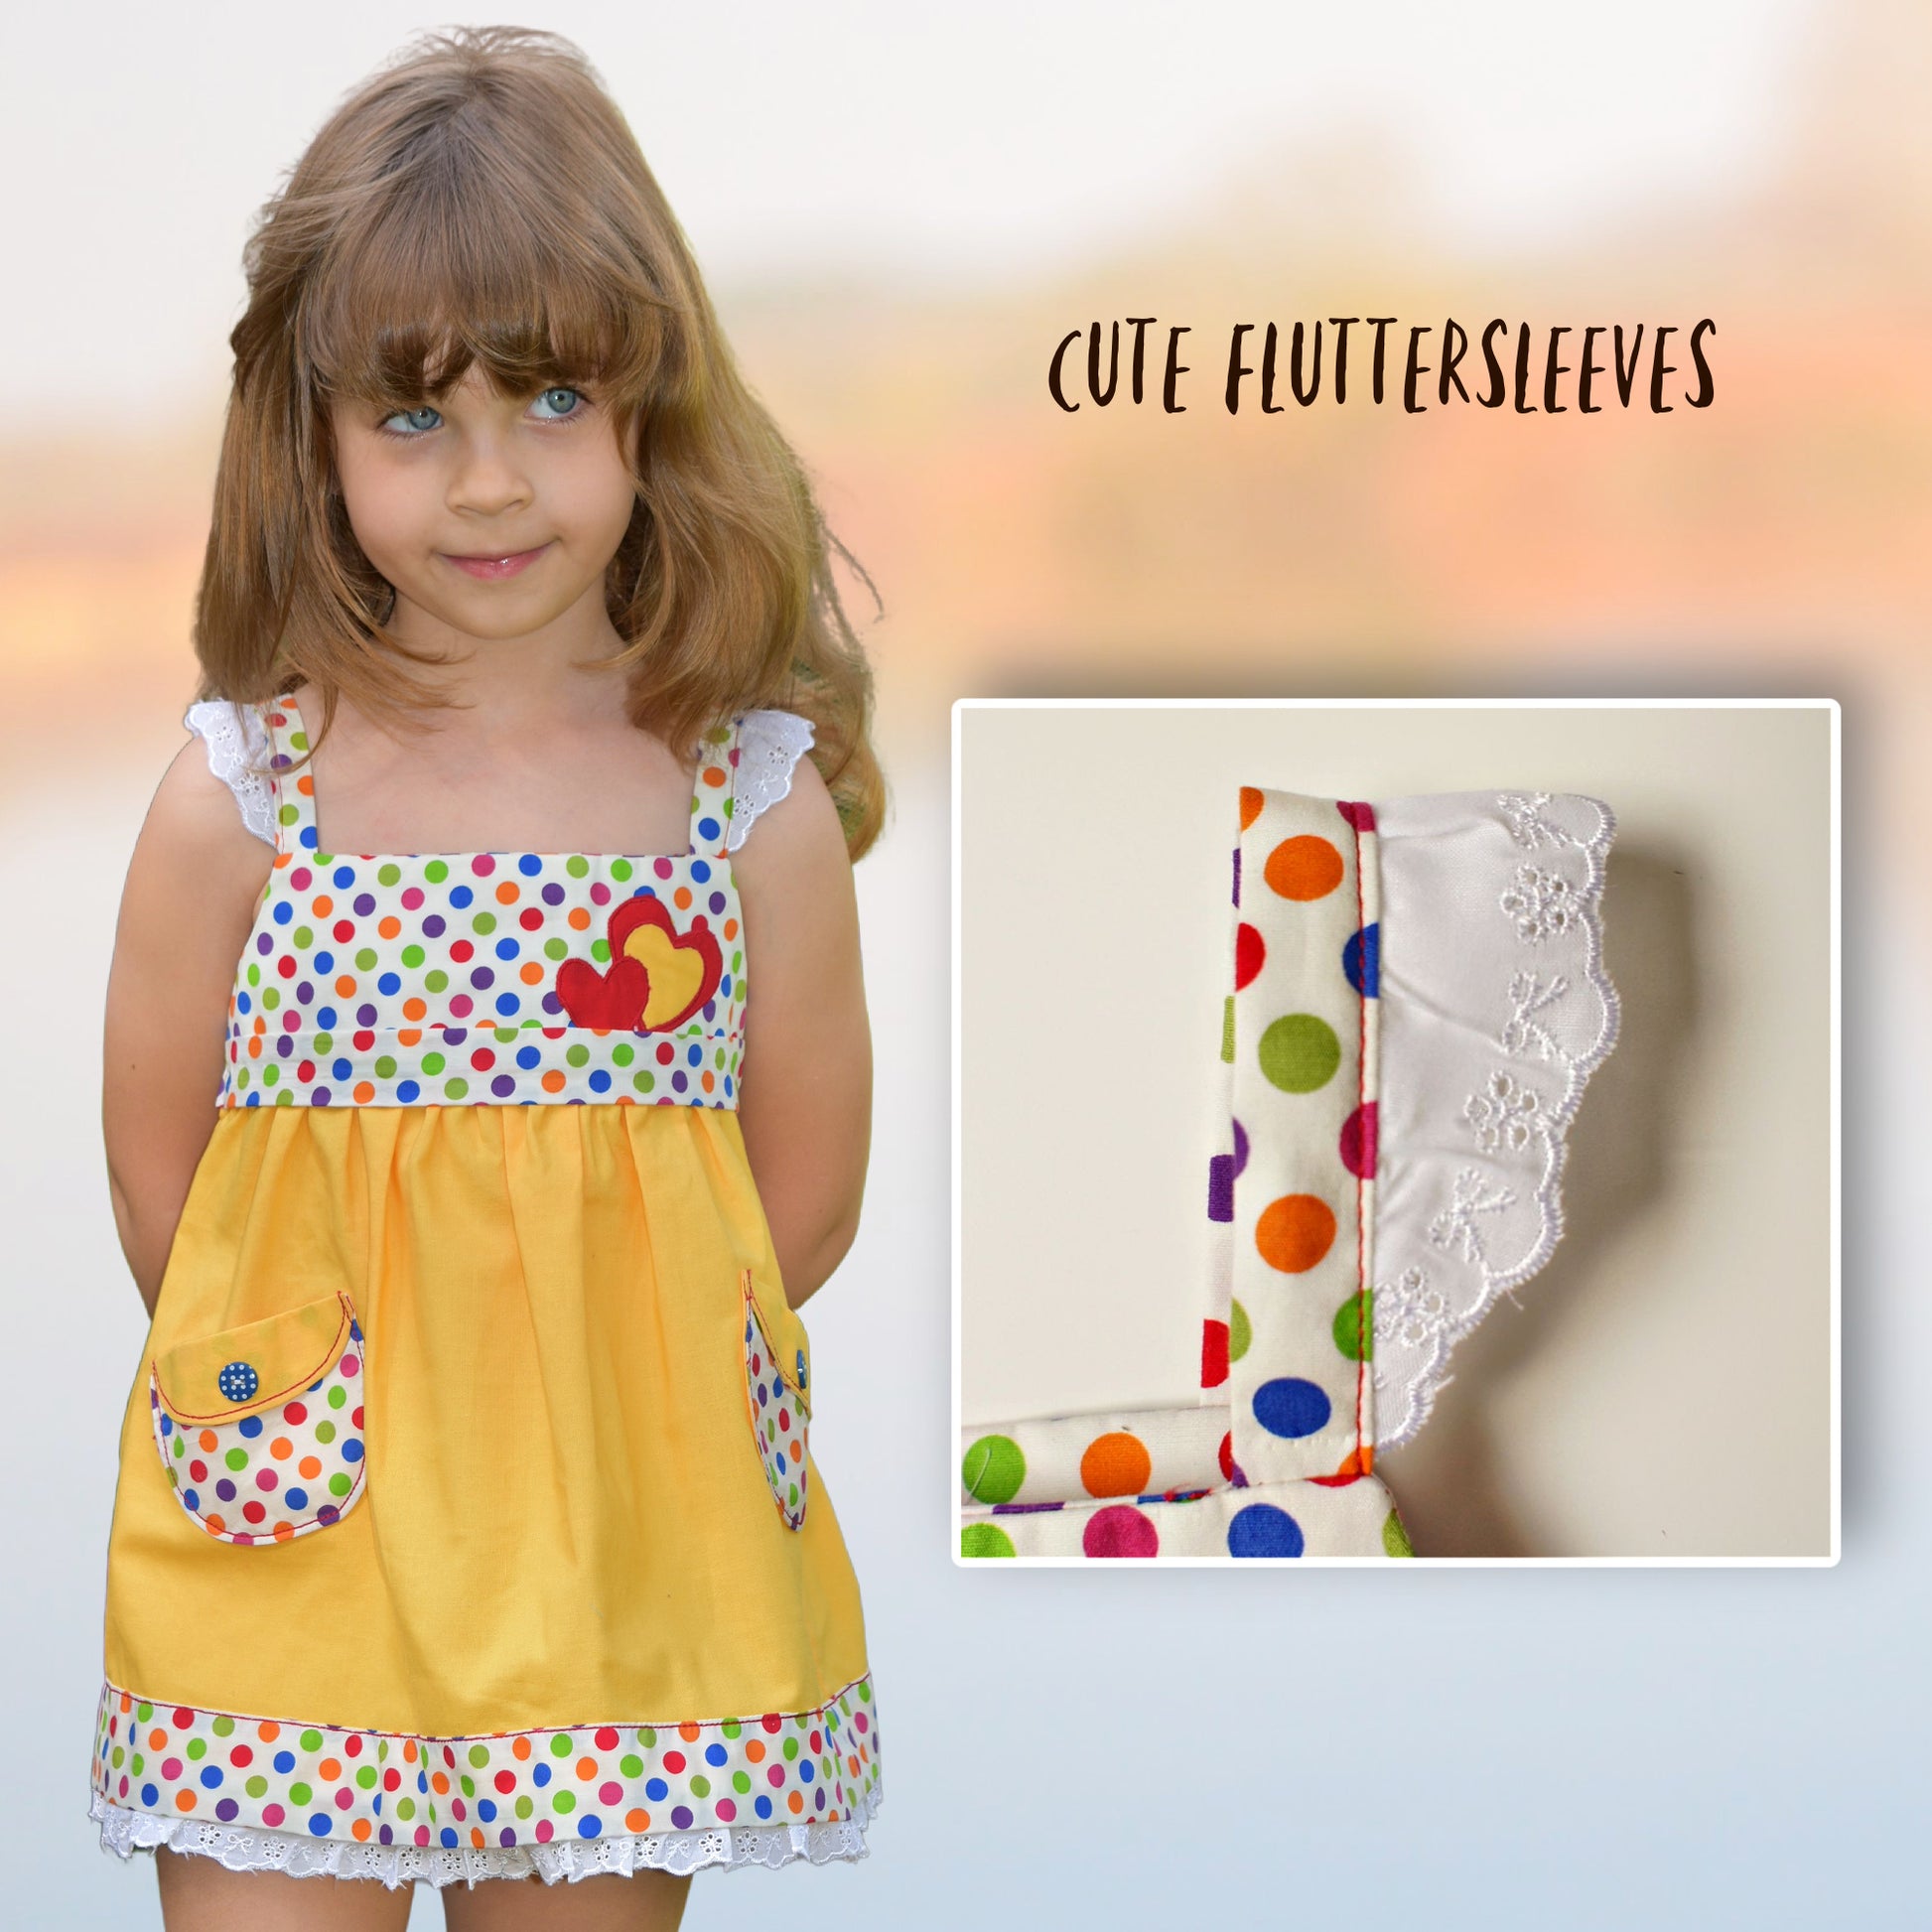
FLUTTER SLEEVES AND NO SERGER NECESSARY

ROMANTIC VERSION WITH TIE BACKS & FRONT BOW

NATALIE HACK: SEWING A BOHO DRESS WITH TIERED SKIRT